Introduction
These DIY helping hands came out of frustration. Every cheap third hand I tried wobbled, tipped over or couldn't hold a bigger board, so I built my own from a metal plate, a coil of steel wire, some clear tubing and four small spring clips.
The result is surprisingly sturdy. The four wire arms bend to any position and stay there, the heavy plate keeps everything from tipping, and the clips hold anything from an Arduino Uno to a large power-supply board. It took me about an hour and cost around €10.
If you solder small builds like my copper wire lamp or the mini Tesla coil, a good third hand makes the job much easier.
 Watch the full build on YouTube
Full build · 10:05
Watch the full build
Every step, the mistakes and the first test, in one video.
Tools and materials
01 Tools
- Pliers (flat-nose and round-nose) for bending the wire
- Wire cutters
- Utility knife or scissors to cut the tubing
- Screwdriver and a small spanner for the bolts
- Drill (only if your plate has no holes near the corners)
02 Materials
- Flat galvanised steel mounting plate for the base
- Galvanised steel wire (from a coil) for the four arms
- Clear PVC tubing to sleeve the wire
- 4 small metal spring clips with red insulated tips
- 4 bolts with washers and nuts to fix the arms to the plate
Build process
-
Step 1: Gather the materials
Everything for this build is cheap hardware-store stuff: a flat steel mounting plate for the base, a coil of galvanised steel wire for the arms, clear tubing to cover the wire, four small spring clips, and a few bolts, washers and nuts.
The plate is the most important part. The heavier and wider it is, the more stable the whole tool is. Mine is a galvanised mounting plate that already had holes and slots in it.
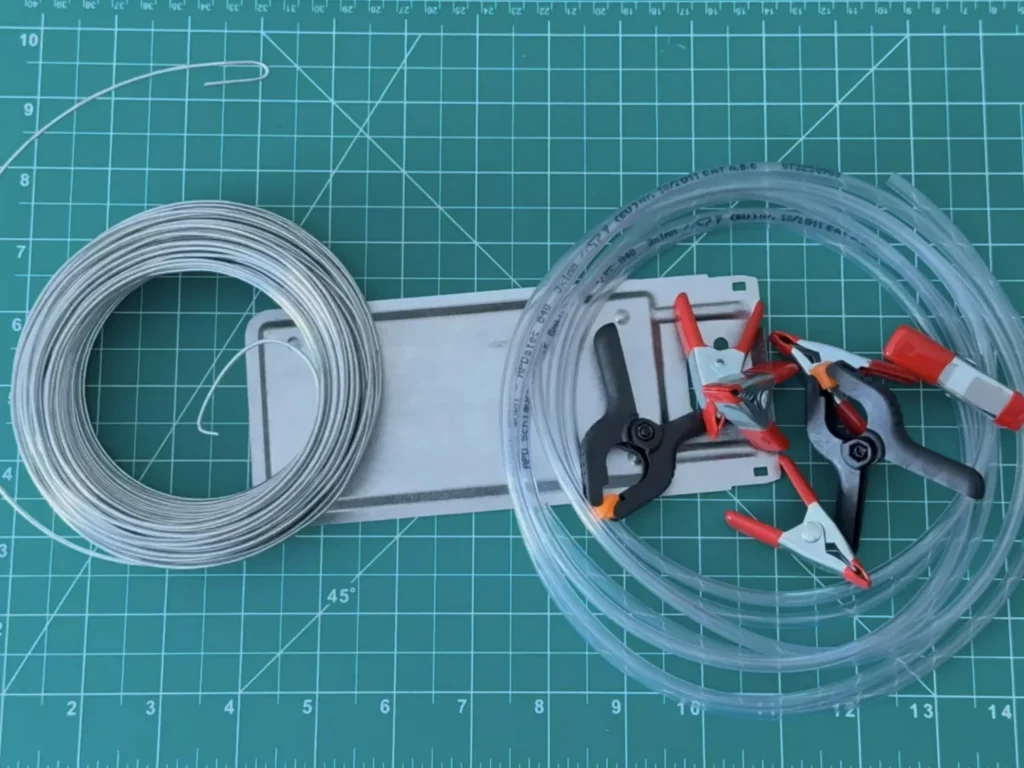
Fig. 01 -
Step 2: Prepare the stand
The plate is the stand. I checked that it sits flat on the table and picked the four holes near the corners for the arms. If your plate doesn't have holes there, drill them now, sized for your bolts.
Placing the arms near the corners spreads them out, so the clips can reach around a board from all four sides.
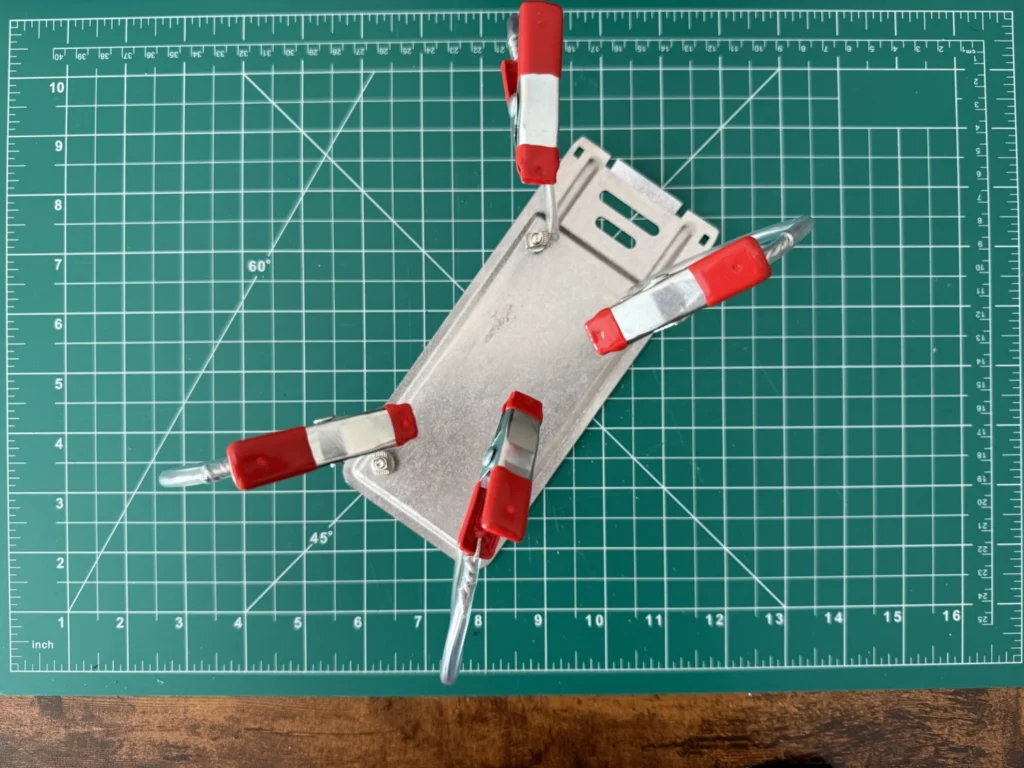
Fig. 02 -
Step 3: Create the arms
This is the main part of the build and takes the longest. For each of the four arms, I cut a length of steel wire and slid clear tubing over it. The tubing makes the arms look tidy, gives you something soft to grab, and stops bare steel from scratching boards.
Each arm is bent into a loop that rises from the plate and curves up towards the clip. At the plate end, I bent the wire into a small eye for the bolt. At the top end, I threaded the wire through the hole in the clip's handle and twisted it back on itself so the clip can't come off.
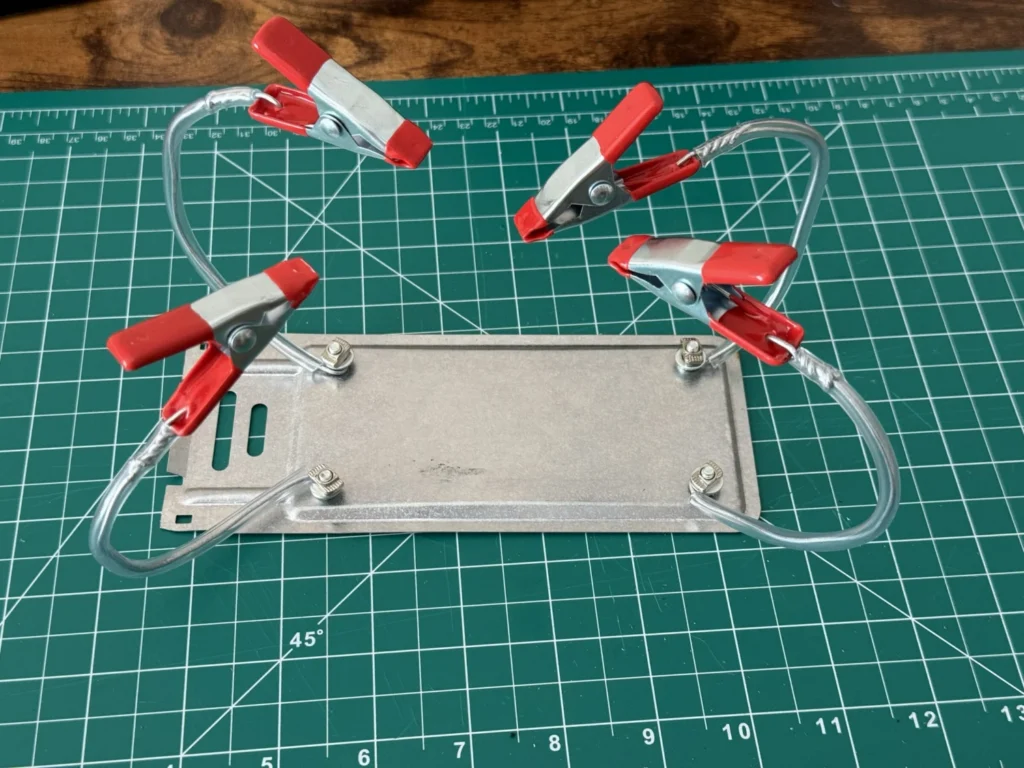
Fig. 03 Heads up
Cut ends of steel wire are sharp. Bend them back or tuck them into the twist so they don’t catch your fingers or scratch a board.
-
Step 4: Bolt the arms to the plate
I pushed a bolt through each wire eye, then through the plate, and fixed it underneath with a washer and a nut. Tighten them firmly. If a bolt is loose, the arm will spin when you push a board into the clips.
With all four arms bolted on, the tool already stands on its own.
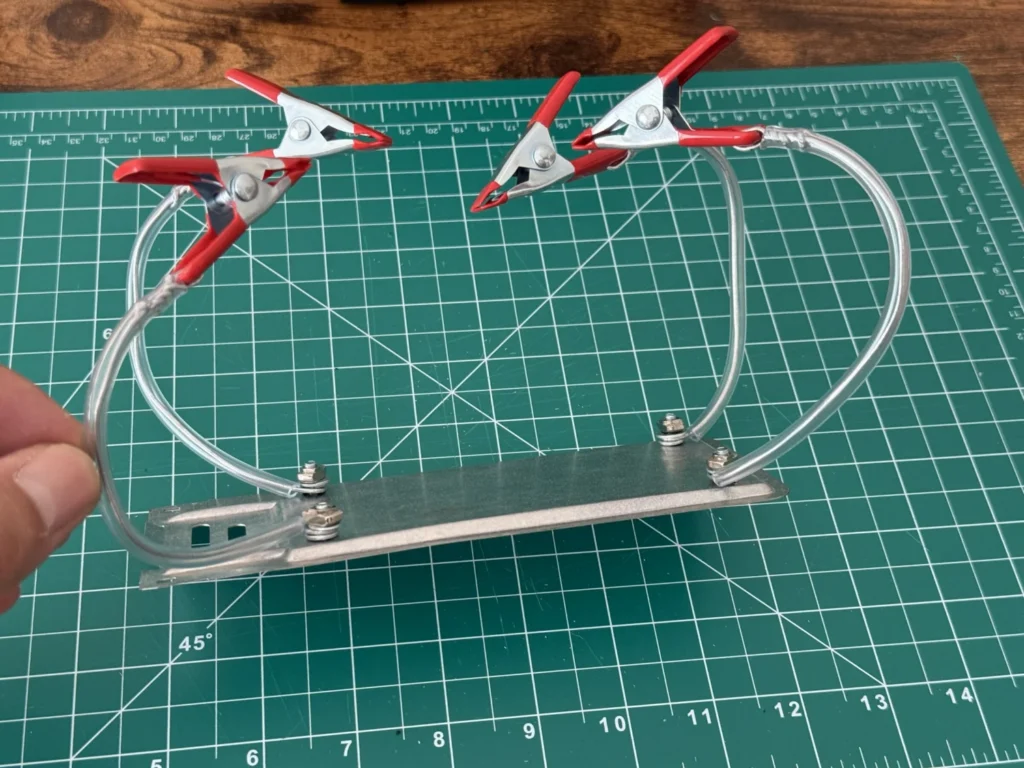
Fig. 04 -
Step 5: Bend the arms into position
Now shape the arms. Because the steel wire is stiff, you can bend each arm into a new position and it stays there, even with a board in the clips.
I set the four clips at roughly the same height, high enough above the plate to leave room to get the soldering iron underneath and around the board.
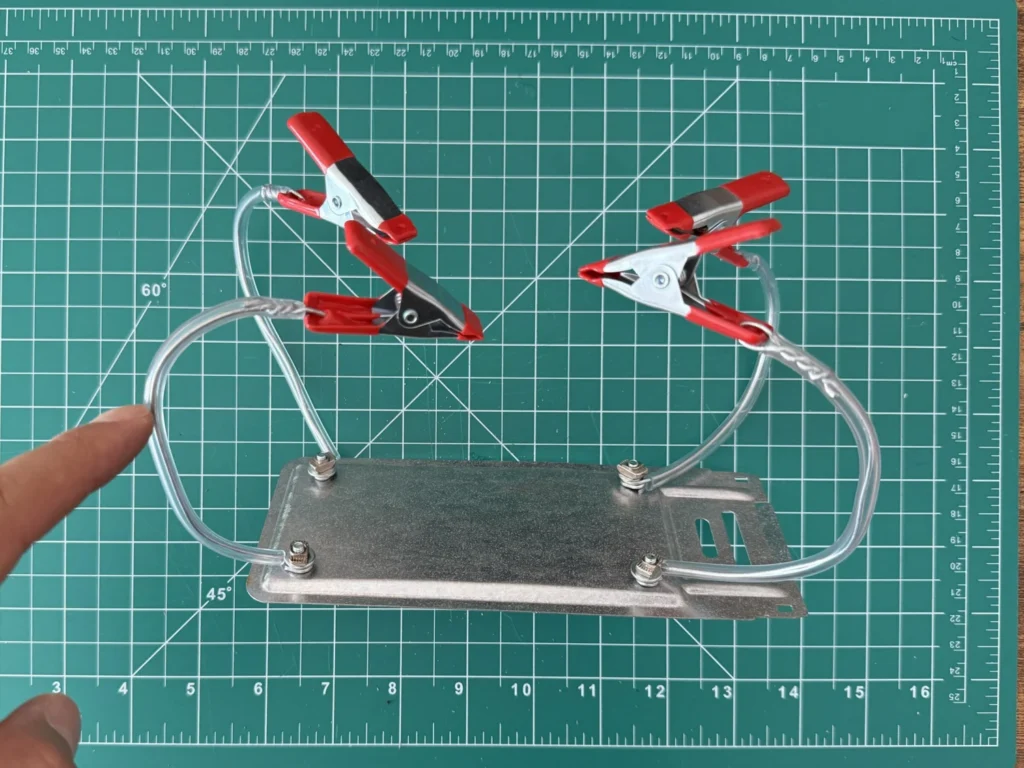
Fig. 05 -
Step 6: Place an Arduino on the holder
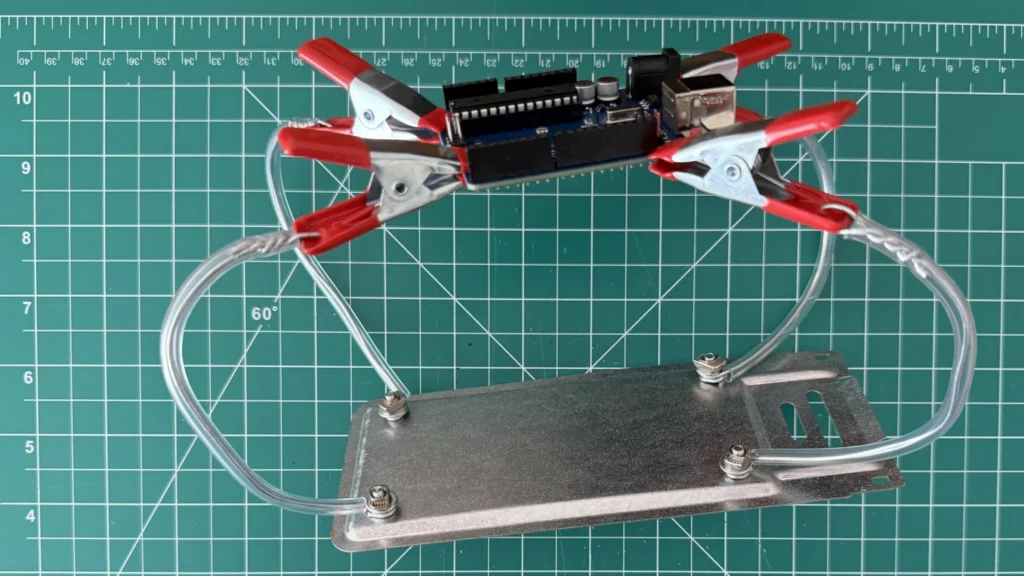
For the first test, I clamped an Arduino Uno with all four clips, one on each edge. It sits level and doesn't move when I touch it, which is exactly what you want when soldering headers or wires to it.
The red insulated tips on the clips matter here: they grip the board edge without biting into it or shorting anything.
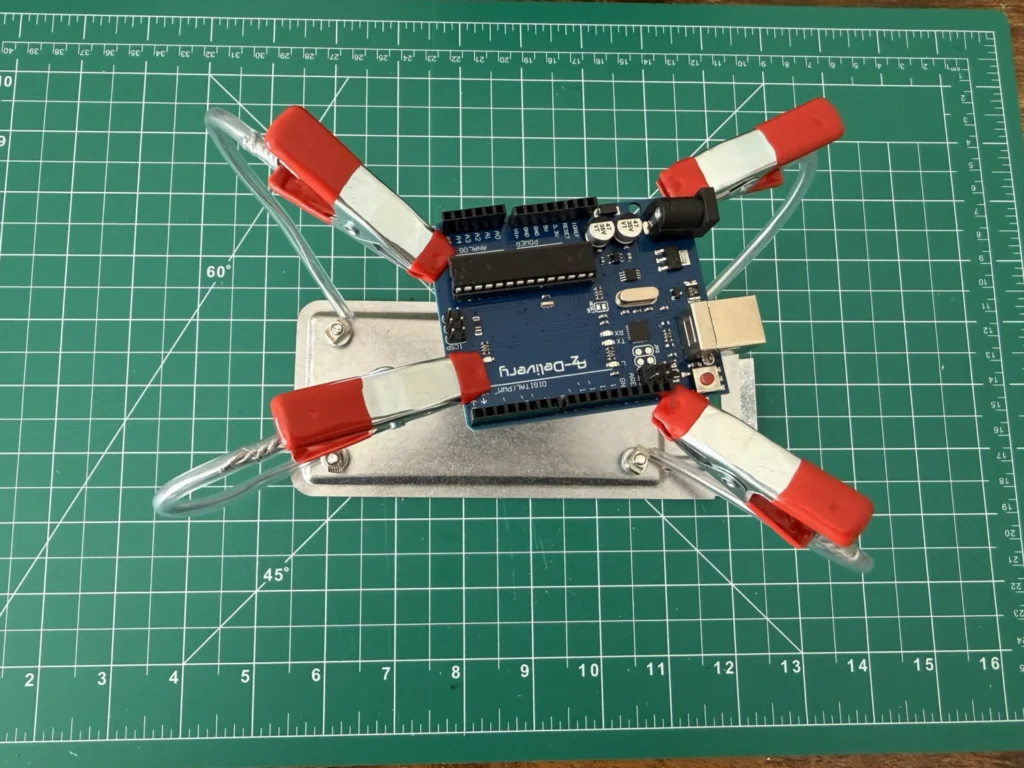
Fig. 06 -
Step 7: Try a bigger board
Then I tried a much bigger board, a power supply from an old device. The arms reach far enough to hold it from all four sides, and I can flip it over to work on the solder side.
This is where these helping hands beat most cheap store-bought ones, which usually only have two small clips and tip over with anything heavier than a few grams.
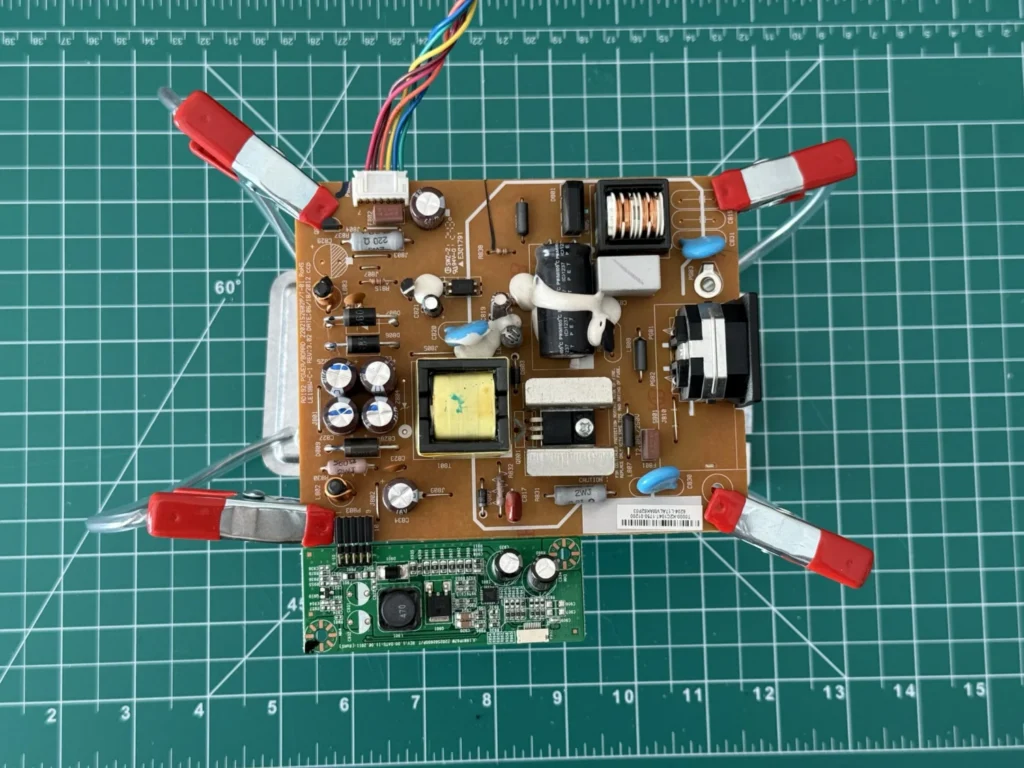
Fig. 07
Problems & mistakes
The trickiest part is getting the wire thickness right. Thin wire is easy to bend but sags under a heavy board, while very thick wire is hard to shape by hand. The galvanised wire I used is a good middle ground, but don't go thinner.
The second thing is the bolts. If they aren't tight, the arms turn around them. Tighten them properly and check them again after the first few uses.
Watch out
If you skip the tubing, bare steel arms will scratch boards and can short exposed pads. Sleeve every arm.
Final result
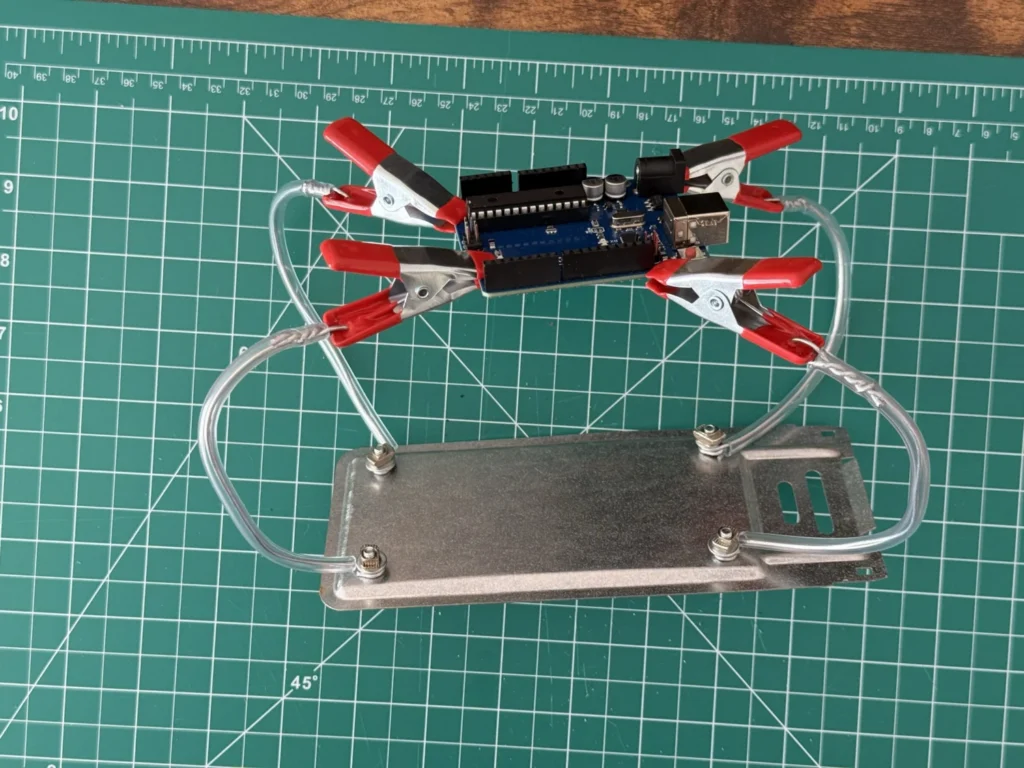
The finished DIY helping hands are one of the most useful tools on my bench. The heavy plate keeps them stable, the four arms bend wherever I need them, and the clips hold everything from a small Arduino to a large power-supply board.
For about €10 and an hour of work, it holds better than many store-bought third hands. You can watch the whole build in the video.
What I would change
I would stick rubber feet under the plate so it doesn't slide on a smooth desk.
A fifth arm with a small magnifier or an LED would make it even better for tiny SMD work.