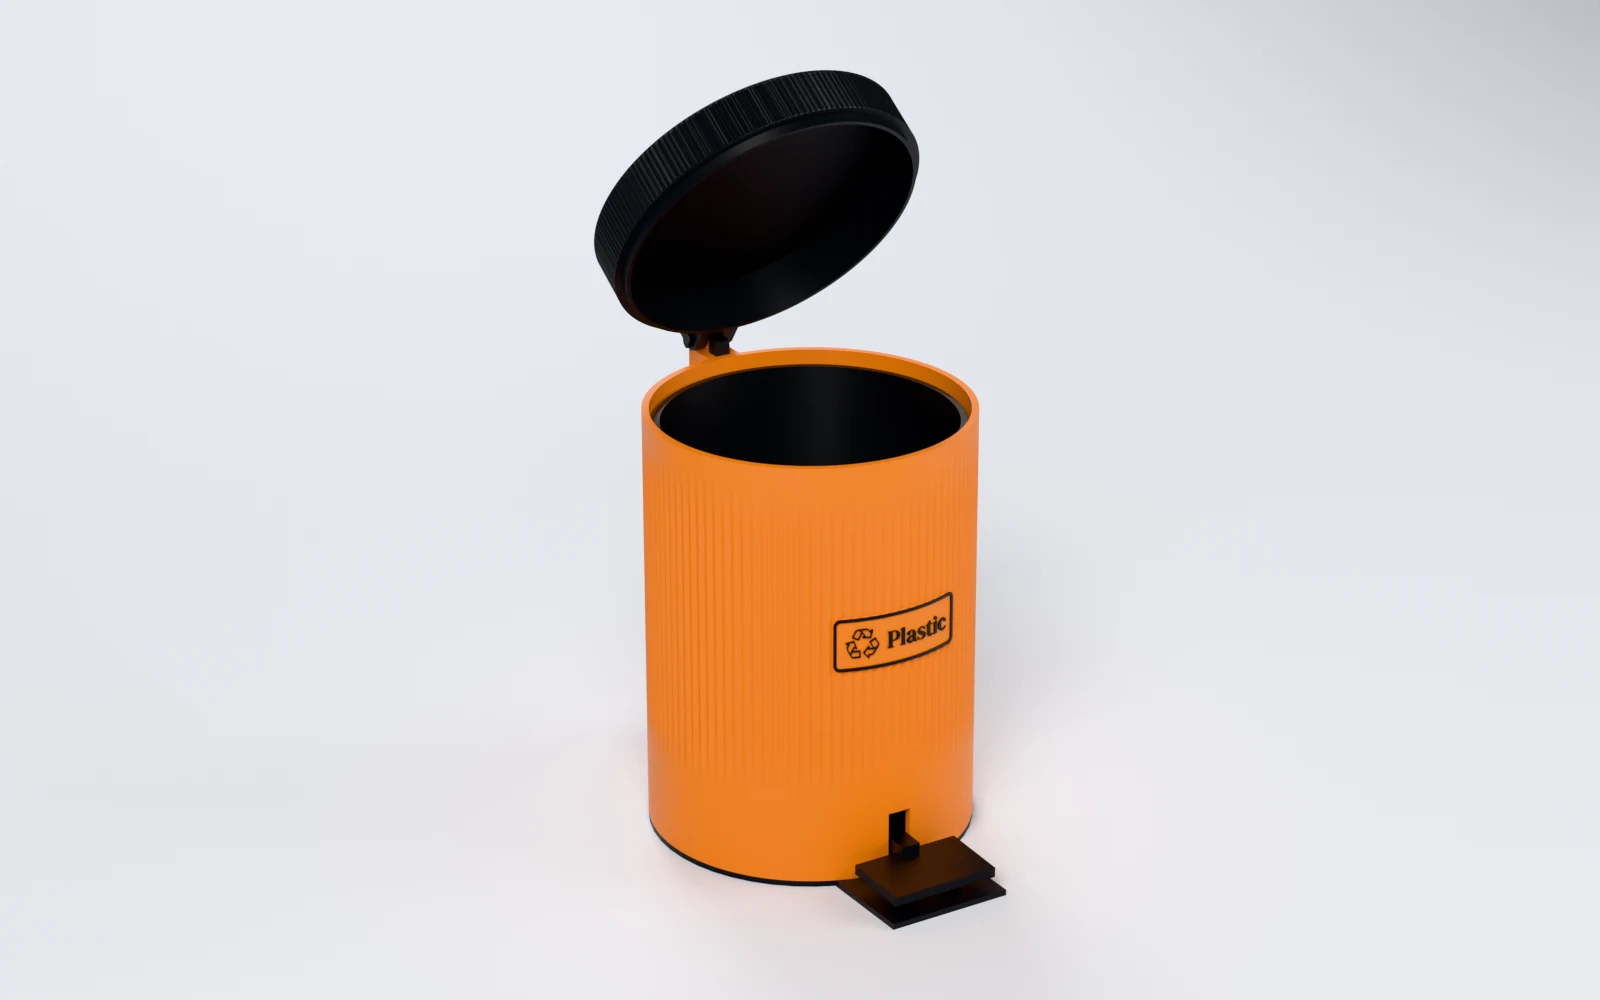
What can you make with Pedal Bin Studio?
A round or rounded-square pedal bin with a lift-out bucket, from 40–220 mm wide and a body 50–300 mm tall. Makers use it for:
- A desk bin for paper and pencil shavings, opened with a foot.
- Small bins for sorting waste, each with its word and icon: paper, plastic, glass.
- A bathroom bin in a classic pattern, in the colours of the room.
- A workshop bin for offcuts and supports beside the printer.
- A gift with someone's name or logo on the body and the lid.
How do you design a pedal bin, step by step?
Pedal Bin Studio walks you through five steps. Continue takes you to the next one, and you can click any step to go back. The bin beside the steps follows every change; Press the pedal shows the lid opening.
1. Pick a size
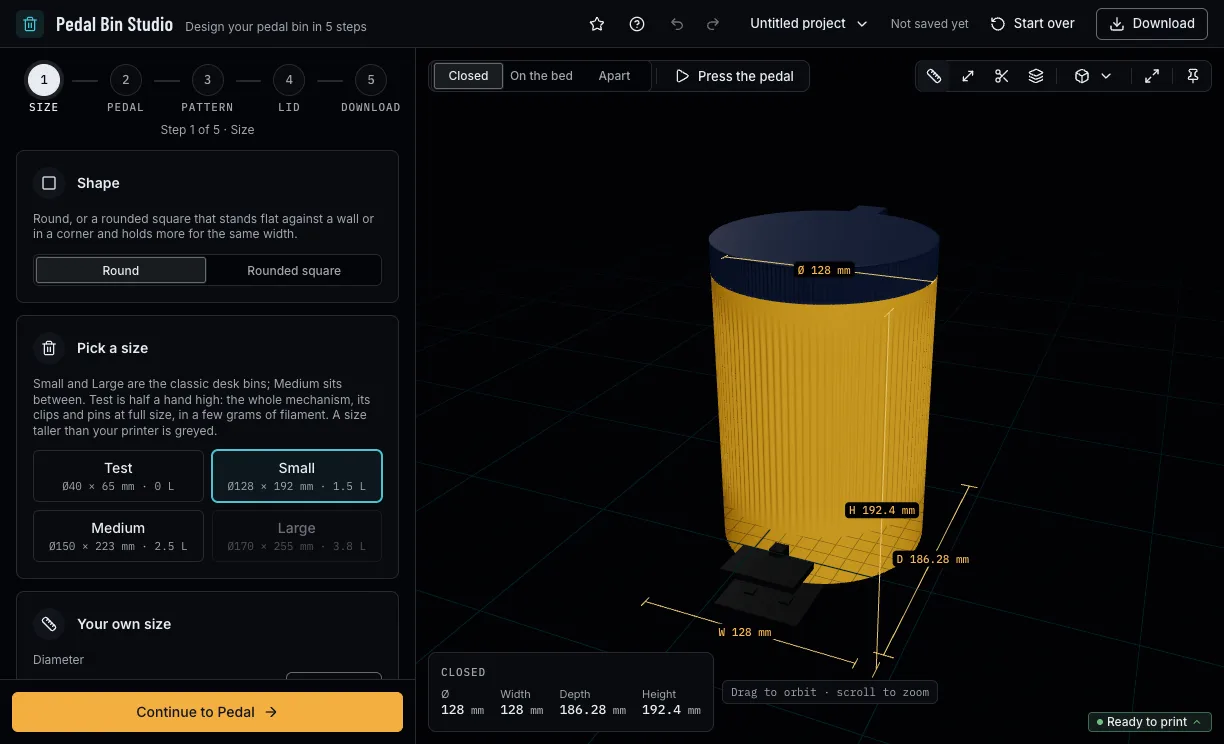
Choose round or a rounded square, which stands flat against a wall, with its corner. Pick a ready size (Test, Small, Medium, Large) or set the body's diameter, height and wall yourself. Test, Ø40 × 50 mm, is the smallest: the whole mechanism, its clips and pins at full size, in a few grams of filament. The bucket's litres, its opening, the closed height and the bin bag that fits follow as you change them; a size too big for your printer is greyed.
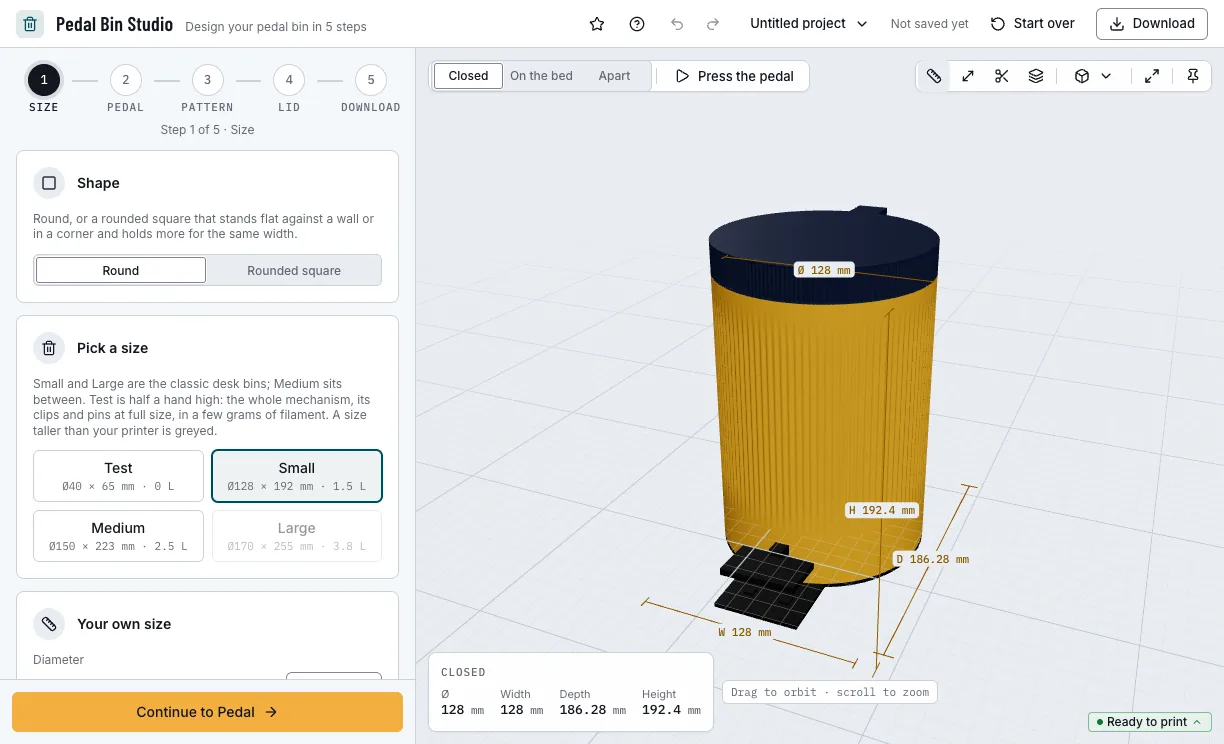
Step 1: the size and what the bucket holds. 2. Check the pedal
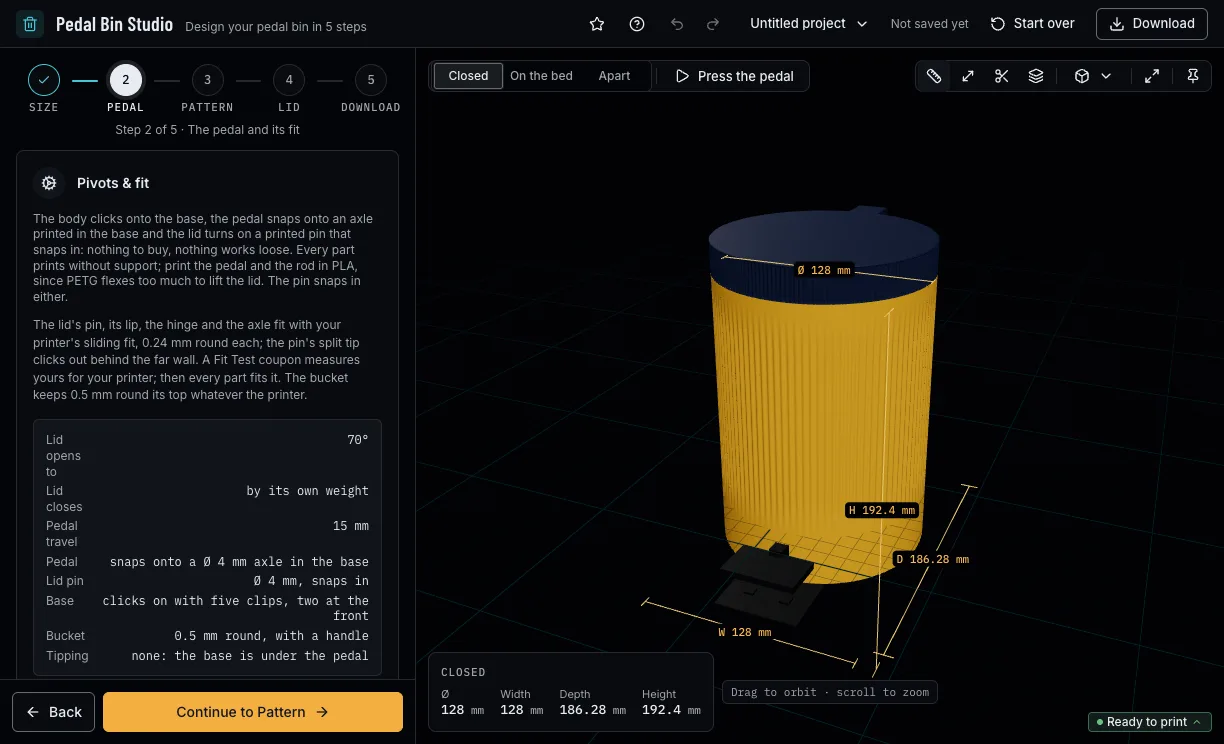
The pedal snaps onto an axle printed in the base, or turns on a pin, and its rod snaps into it or stands loose; the lid turns on a printed snap pin, the body clicks onto the base with three clips at the back, one behind the column, two more at the front from Ø120 up, and keys that stop it turning, and the bucket sits snug, 0.5 mm round its top, with a handle inside it. The pins, the lid and the clips follow your printer's fits, which a Fit Test coupon measures. The step shows how far the lid opens (70°), how far the pedal travels and the pins' size. The base reaches under the pedal, so a press cannot tip the bin. The Apart view pulls every part away along its way in, to check them before you print.
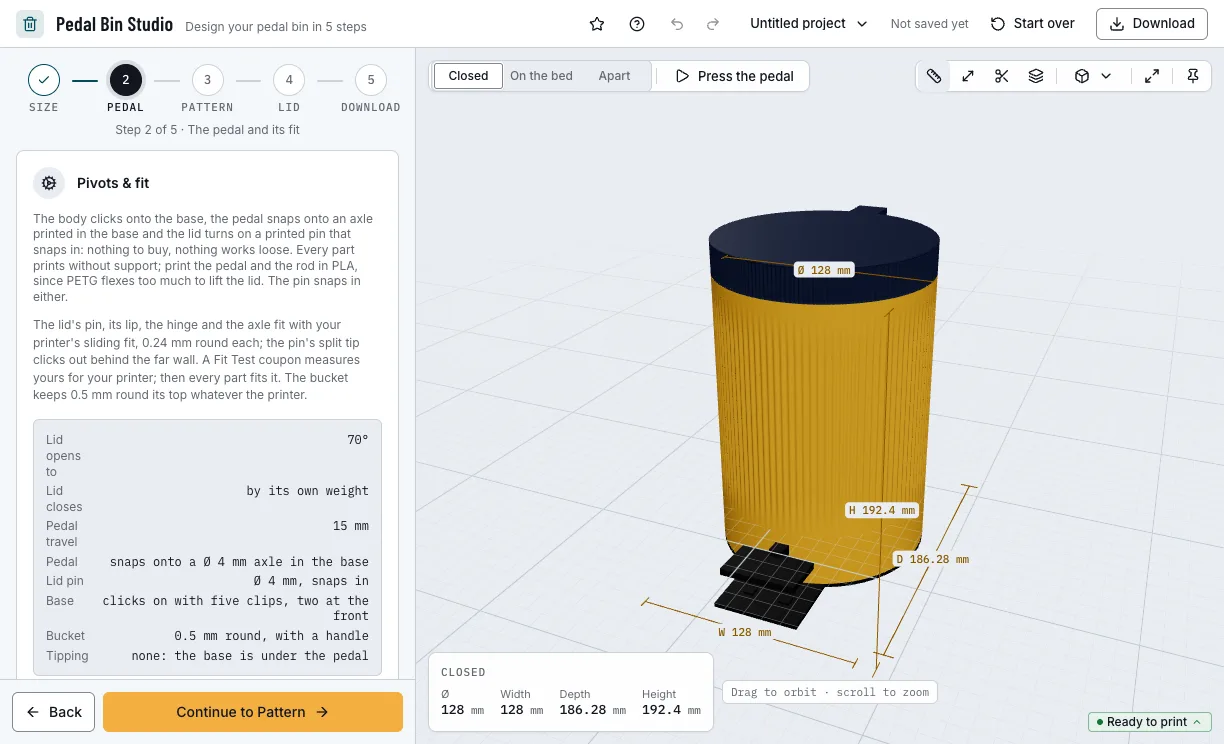
Step 2: the pedal and its fit. 3. Choose a pattern and a label
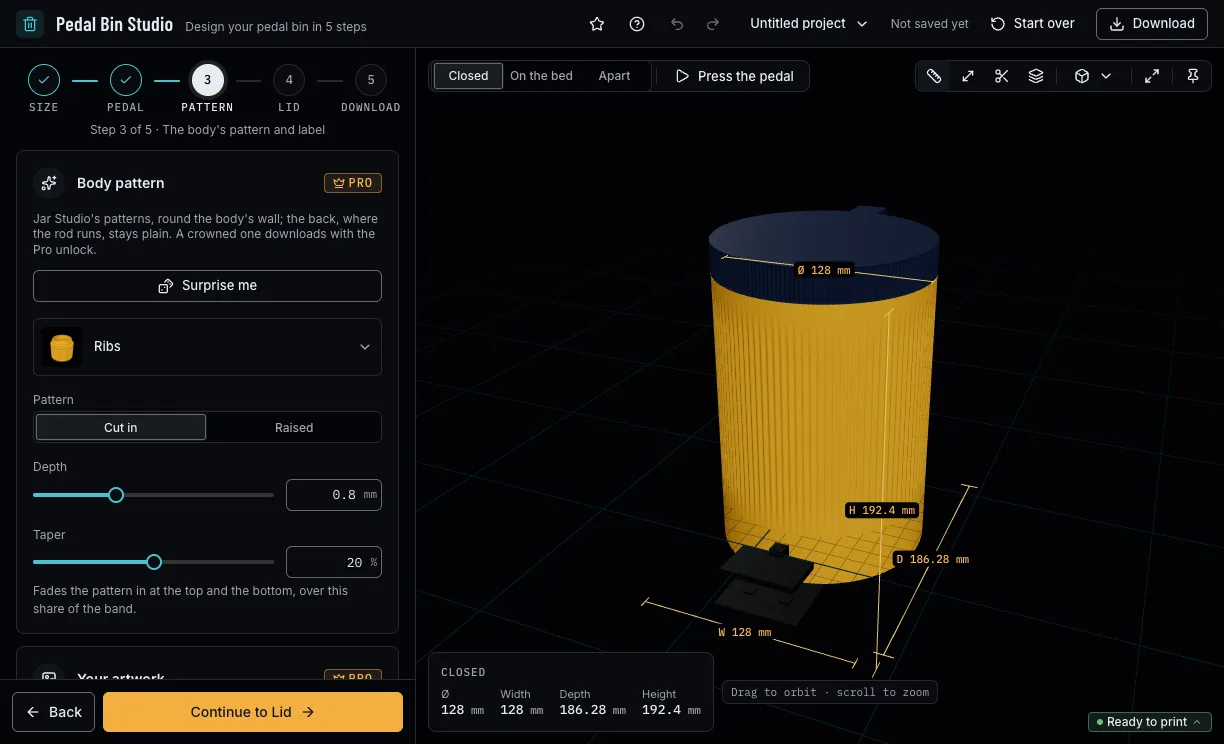
Search Jar Studio's 40 patterns or let Surprise me pick one. Cut it into the body or raise it; the back, where the rod runs, stays plain. Further down, put your own SVG or picture over the pattern, or label the front with a word and an icon.
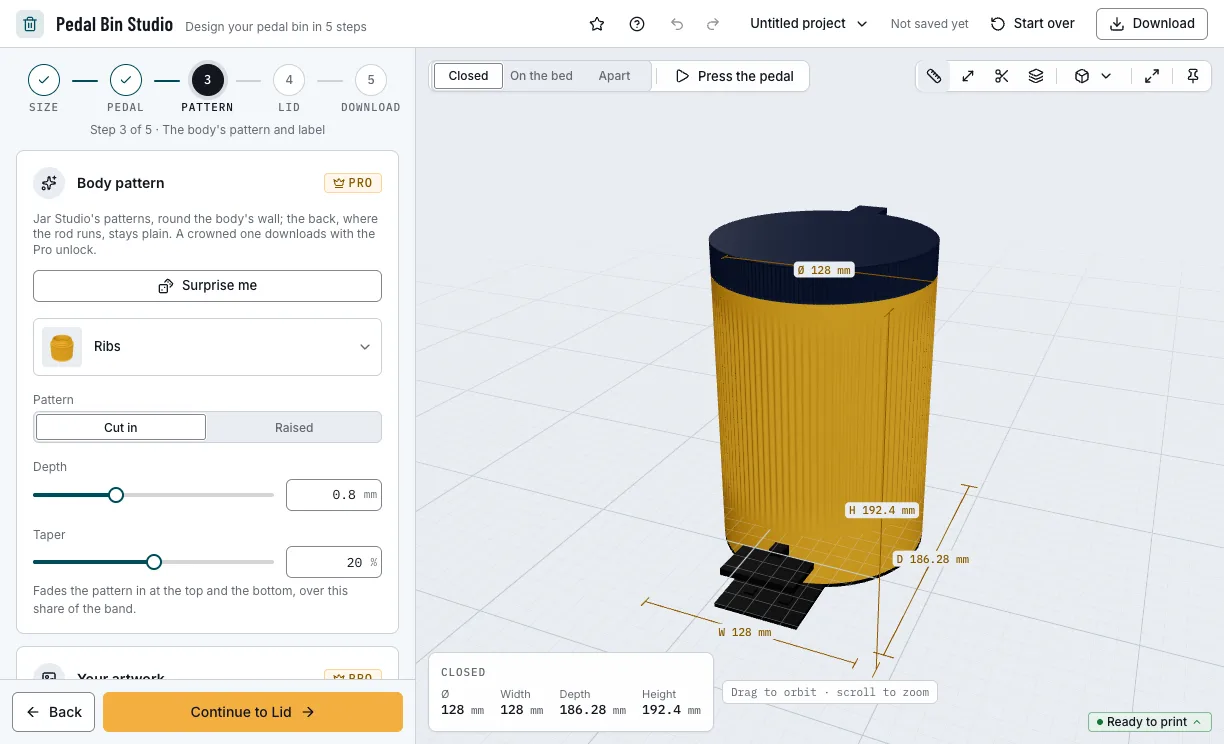
Step 3: the body's pattern, your artwork and the label. 4. Style the lid
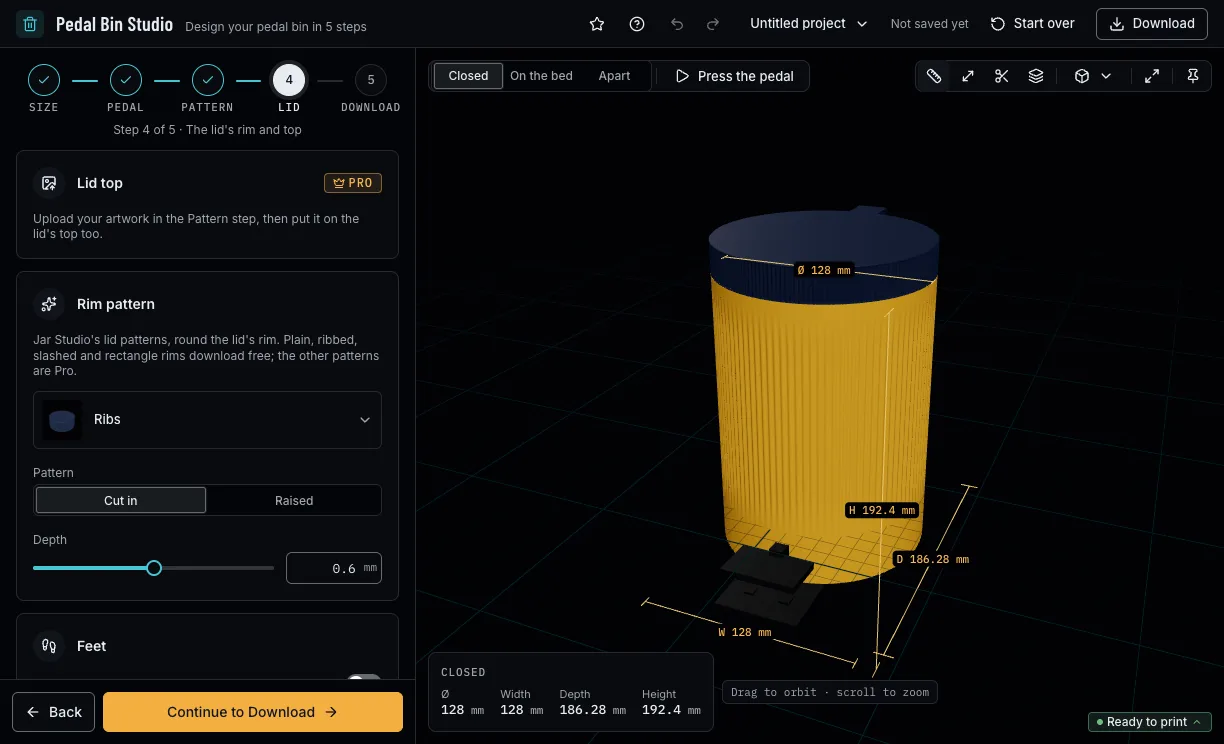
Put your artwork on the lid's top, cut in or as a flush inlay in its own colour, and give the rim a pattern: ribs, tread, arrows, hexagons, a Greek key and more. The base's underside is flat; switch on Feet pockets for Ø12 × 3 mm rubber bumpers or TPU feet.
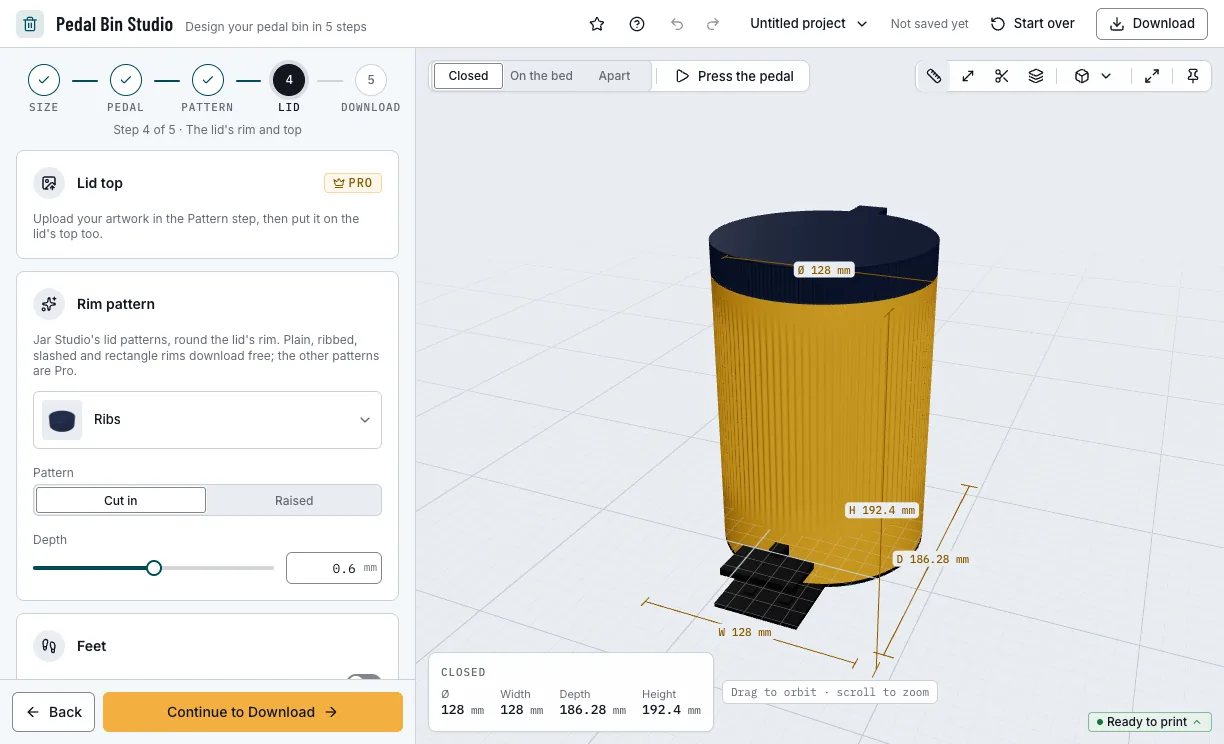
Step 4: the lid's top and rim. 5. Colour and download
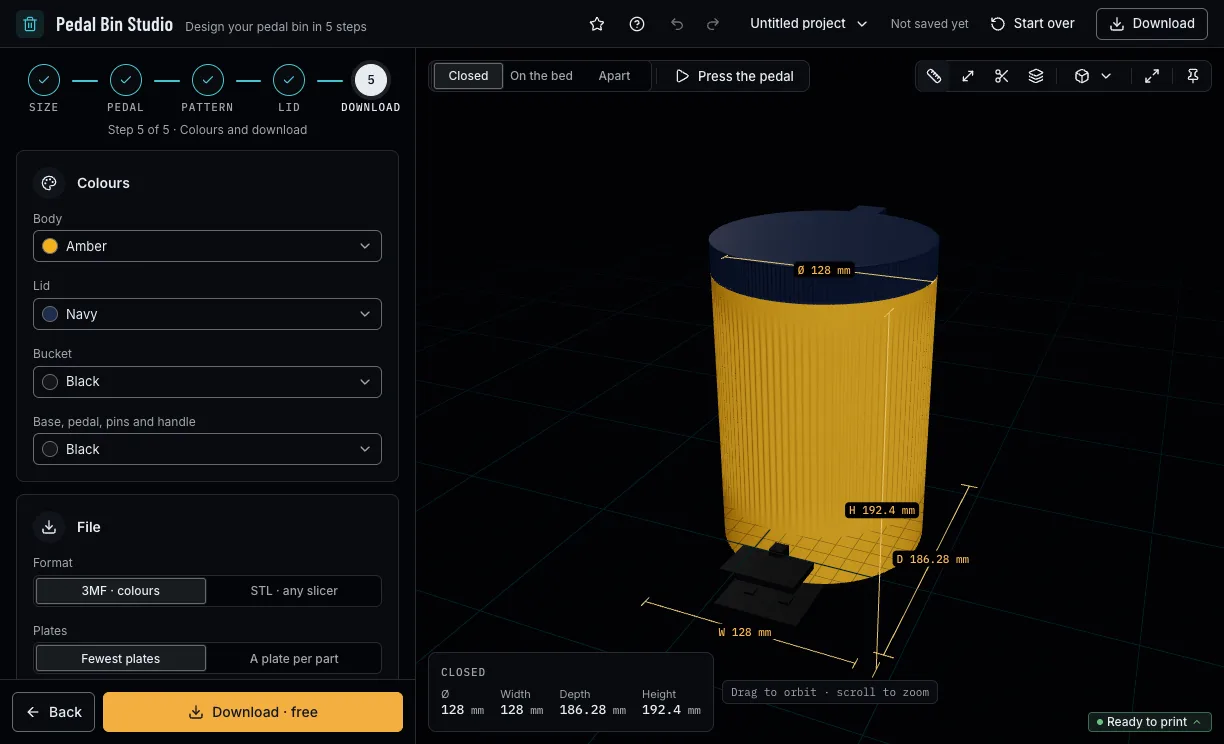
Pick the colours of the body, the lid, the bucket and the mechanism: the base, the pedal, the pins and the handle. A 3MF keeps each part in its colour, packed on as few plates as your bed holds or one per part; STL gives one file per part for any slicer. Downloads need a free NabiMakes account.
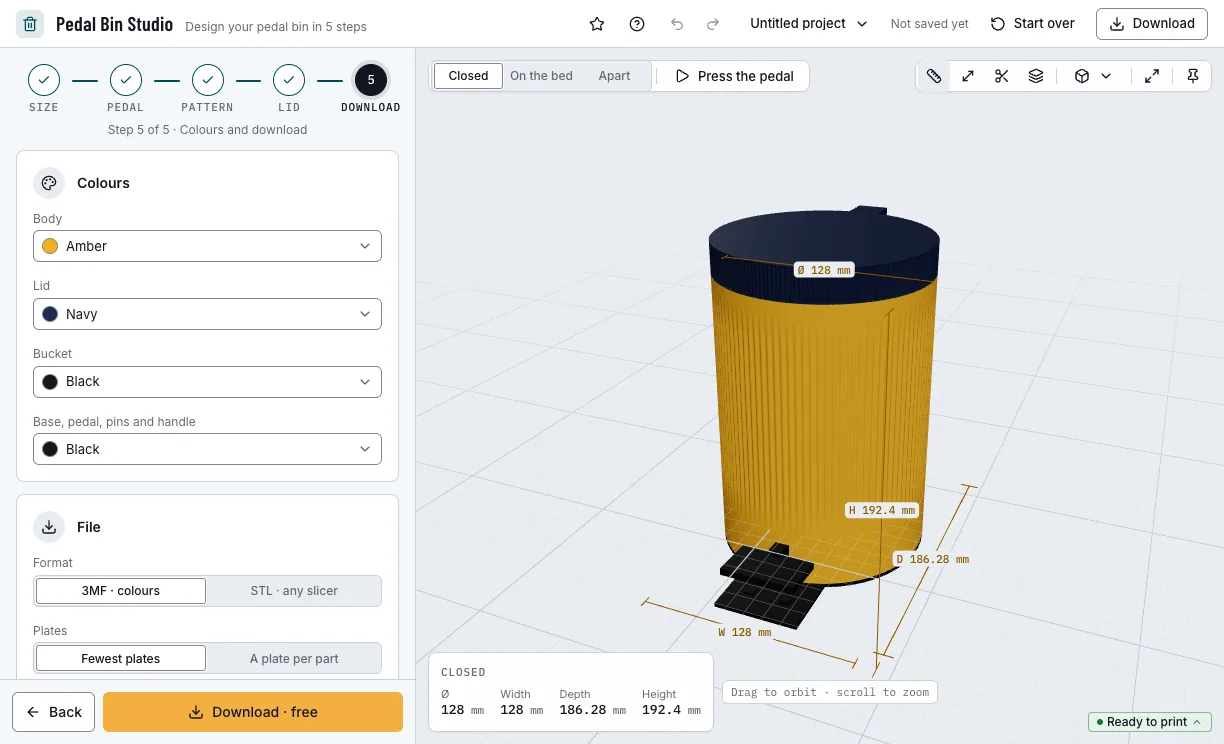
Step 5: colours and the file.
Which bins can you start from?
Each example opens in Pedal Bin Studio as a new design, beside your own. Change anything, then download it.
Test bin
The smallest working bin, to try the pedal, the fits and the colours in little filament.
- Ø 40 mm
- Ribs
- Free
Paper bin
The Small desk bin with fine dashes and a word on the front.
- Ø 128 mm
- Label “Paper”
- Free
Classic bathroom bin
A Greek key round the Medium bin, with a rope rim.
- Ø 150 mm
- Greek key
- Pro
Which print settings work best for a pedal bin?
Print the parts as they download: the body and the bucket upright, the lid on its top, the base, the pedal, the rod, the pins and the handle flat. None needs supports; the TPU feet print on a plate of their own. The layer height is a starting point for your slicer.
| Filament | Layer height to start | Thinnest wall | Supports | Notes |
|---|---|---|---|---|
| PLA | 0.2 mm | 0.8 mm | None | Stiff enough for the pedal and the rod to lift the lid; the best choice for them. |
| PETG | 0.2 mm | 0.8 mm | None | Good for the body, the bucket and the pins; a PETG pedal flexes too much to lift the lid. |
Tips for a bin whose lid opens every time
- Print the Test bin first: its clips, pins and rod use your printer's fits, as the big bin does.
- Run a Fit Test for your printer: the pins, the lid, the clips and the rod's channel then fit it exactly.
- Check the Apart view before you print: every part pulled away along the way it goes in.
- Hold the pedal level and drop it onto the axle in the base before the body goes on; on the pin joint, set it in its lane and push the pin in from outside the base until its tip clicks. To take it out, pinch the tip's prongs from the other side of the base and push the pin back.
- Push the lid's pin in from its head's side until its split tip clicks out behind the far wall; pinch the tip's prongs to take it out again.
- Slide the rod down its channel in the body's back until it clicks into the pedal.
- Push the body onto the base, its keys in their slots, until all its clips click: three at the back, and two at the front from Ø120 up. To take it off, turn the bin over, push the side clips' arms in and the back clip's arm back, through their slots in the floor, with a screwdriver or a coin, and lift the body.
- Squeeze the handle's ends together and let its pegs click into the holes in the bucket's wall; folded, it rests on the small tab at the front. Then hang the bag inside the bucket.
- Before you print, check it on the view's bar: Dimensions shows its size, Measure the distance between two points, Section cuts it open and Layers steps through it as your printer will.
What if the lid sticks, the pedal is stiff or the bin moves?
- The lid does not fall shut
- Check the rod slides freely in its channel; clean its ends, or run a Fit Test so the channel follows your printer.
- The pedal is stiff or the lever rubs
- Clean the saddles' holes, and print the pedal in PLA: PETG flexes before it lifts the lid.
- A pin slips out
- Push it until its tip clicks out behind the far wall. If it still slips, run a Fit Test: the pins' barbs grow with a looser fit.
- The bucket sticks
- It sits 0.5 mm from the body all round: leave the brim off in your slicer, check its foot has no elephant's foot, and lift it by its handle.
- The body lifts off the base
- Push it down until all its clips click. If one will not catch, check its arm moves freely in its slot in the floor: no brim, nothing fused round it.
Is Pedal Bin Studio free?
Designing and previewing are free for everyone. Downloading needs a free account; a design that uses a Pro feature needs the one-time unlock, which covers every project.
Free
Free- Every size, Test included
- A plain body and 11 body patterns, a plain rim and 4 rim patterns
- The label, the colours, the plates
- 3MF and STL
Pro
- All 40 body patterns and 18 rim patterns
- Your own SVG or picture on the body and the lid
- Surprise me
Every setting, with its range and default
Lengths are in millimetres. Pedal Bin Studio refuses values outside these ranges.
| Setting | Range | Default | What it does |
|---|---|---|---|
| 1 · Size | |||
| Shape | Round, Rounded square | Round | A rounded square stands flat against a wall or in a corner and holds more for the same width; its diameter is its width across the faces. |
| Corner | 12 mm to 40 % of the width | 20 % of the width | A rounded square's corners, outside. The pattern, the label and your artwork run on round them. |
| Diameter | 40–220 mm | 128 mm | The body's outside; the lid is as wide. |
| Body height | 50–300 mm | 169 mm | The body, without the base and the lid. |
| Wall | 1.6–4 mm | 2 mm | The body's and the lid's walls. |
| 2 · Pedal | |||
| Fits | Your printer's | The filament's, or a Fit Test's | Size the pins' bores and the rod's channel. |
| Pedal joint | Snap-on axle, pin | Snap-on axle | The axle is printed in the base and the pedal snaps onto it from above; the pin goes through both from the side. |
| Rod | Snapped to the pedal, loose | Snapped to the pedal | Snapped, the rod's foot clicks into the pedal's back end and cannot lift away; loose, the lid holds it down. |
| 3 · Pattern | |||
| Pattern | 40 patterns or none | Ribs | Wraps the body's wall; 11 are free. |
| Pattern style | Cut in, raised | Cut in | Cut into the wall, tops flush, or standing out; the rim follows. |
| Depth | 0.6–1.2 mm | 0.8 mm | How far it is cut in or raised. |
| Taper | 0–40 % | 20 % | Fades the pattern in at the top and the bottom. |
| 3 · Your artwork (Pro) | |||
| Artwork | SVG, PNG or JPEG | None | Your own outlines over the pattern, up to 20,000 points. |
| Layout | Once, around, tiled | Once | Once on the front, copies round the bin, or a tiled field. |
| Size | 2–500 mm | Fitted to the bin | Its width on the wall; the height keeps its shape. |
| Style | Cut in, raised | Cut in | Cut into the wall or standing out. |
| Depth | 0.6–1.2 mm | 0.8 mm | How far it is cut in or raised. |
| Clear space | 0–5 mm | 1.5 mm | How far the pattern keeps from its outline. |
| Pattern inside | On, off | Off | The wall's pattern shows in its holes and gaps. |
| Rotation | −180–180° | 0° | Turns it about its centre. |
| Mirror | On, off | Off | Flips it left to right. |
| Turn | −180–180° | 0°, 180° with a label | Where round the bin it sits; the back stays plain. |
| Lift | −100–100 % | 0 % | How high on the band it sits. |
| Copies | 2–36 | Fitted to the bin | Around: how many copies. |
| Alternate | 0–30 mm | 0 mm | Around: every other copy up, the others down. |
| Gap | 0–30 mm | A quarter of its size | Tiled: the room between copies. |
| Stagger | On, off | On | Tiled: every other row shifted by half a copy. |
| Colour | The body's or a filament | The body's | A colour of its own prints as a part of the body and the lid. |
| 3 · Label | |||
| Label | On, off | Off | A word and an icon on the body's front. |
| Word | Up to 20 characters | Paper | The text on the label; quick words set a sorting word with its icon. |
| Font | 8 bundled fonts | DM Serif Display | The word's typeface. |
| Icon | Noto Emoji, or none | Page facing up | An icon beside the word. |
| Frame | Apothecary, oval, rounded, none | Rounded | The panel's outline. |
| Style | Raised, cut in | Raised | The word, icon and frame stand out or are cut in. |
| Text size | 4–20 mm | 10 mm | Shrinks to fit a small bin. |
| Colour | The body's or a filament | Navy | A colour of its own prints as a part of the body. |
| 4 · Lid | |||
| Lid top | On, off | Off | Your artwork on the lid's top too (Pro). |
| Lid artwork width | 10 mm to 80 % of the lid | 50 mm | Its height keeps the artwork's shape. |
| Lid artwork depth | 0.6–1.2 mm | 0.8 mm | How far it is cut into the top, or how thick its inlay. |
| Rim pattern | 18 patterns or plain | Ribs | The lid's rim; 4 are free. |
| Rim depth | 0.4–0.8 mm | 0.6 mm | How deep the rim's pattern is. |
| Feet pockets | On, off | Off | Four pockets under the base for rubber bumpers or the TPU feet; off, the base stands flat on its floor. |
| TPU feet | On, off | Off | Four feet in TPU for the pockets under the base, on a plate of their own; off, stick Ø12 × 3 mm rubber bumpers in the pockets. |
| 5 · Download | |||
| Body colour | The filament colours | Amber | The body's filament. |
| Lid colour | The filament colours | Navy | The lid's filament. |
| Bucket colour | The filament colours | Black | The bucket's filament. |
| Base, pedal, pins and handle | The filament colours | Black | One filament for the base, the pedal, the rod, the pins and the bucket's handle; the TPU feet take its colour. |
| Format | 3MF, STL | 3MF | 3MF keeps the colours; STL suits any slicer. |
| Plates | Fewest, one per part | Fewest | Fewest packs the parts on your bed; one per part prints each in its colour. |