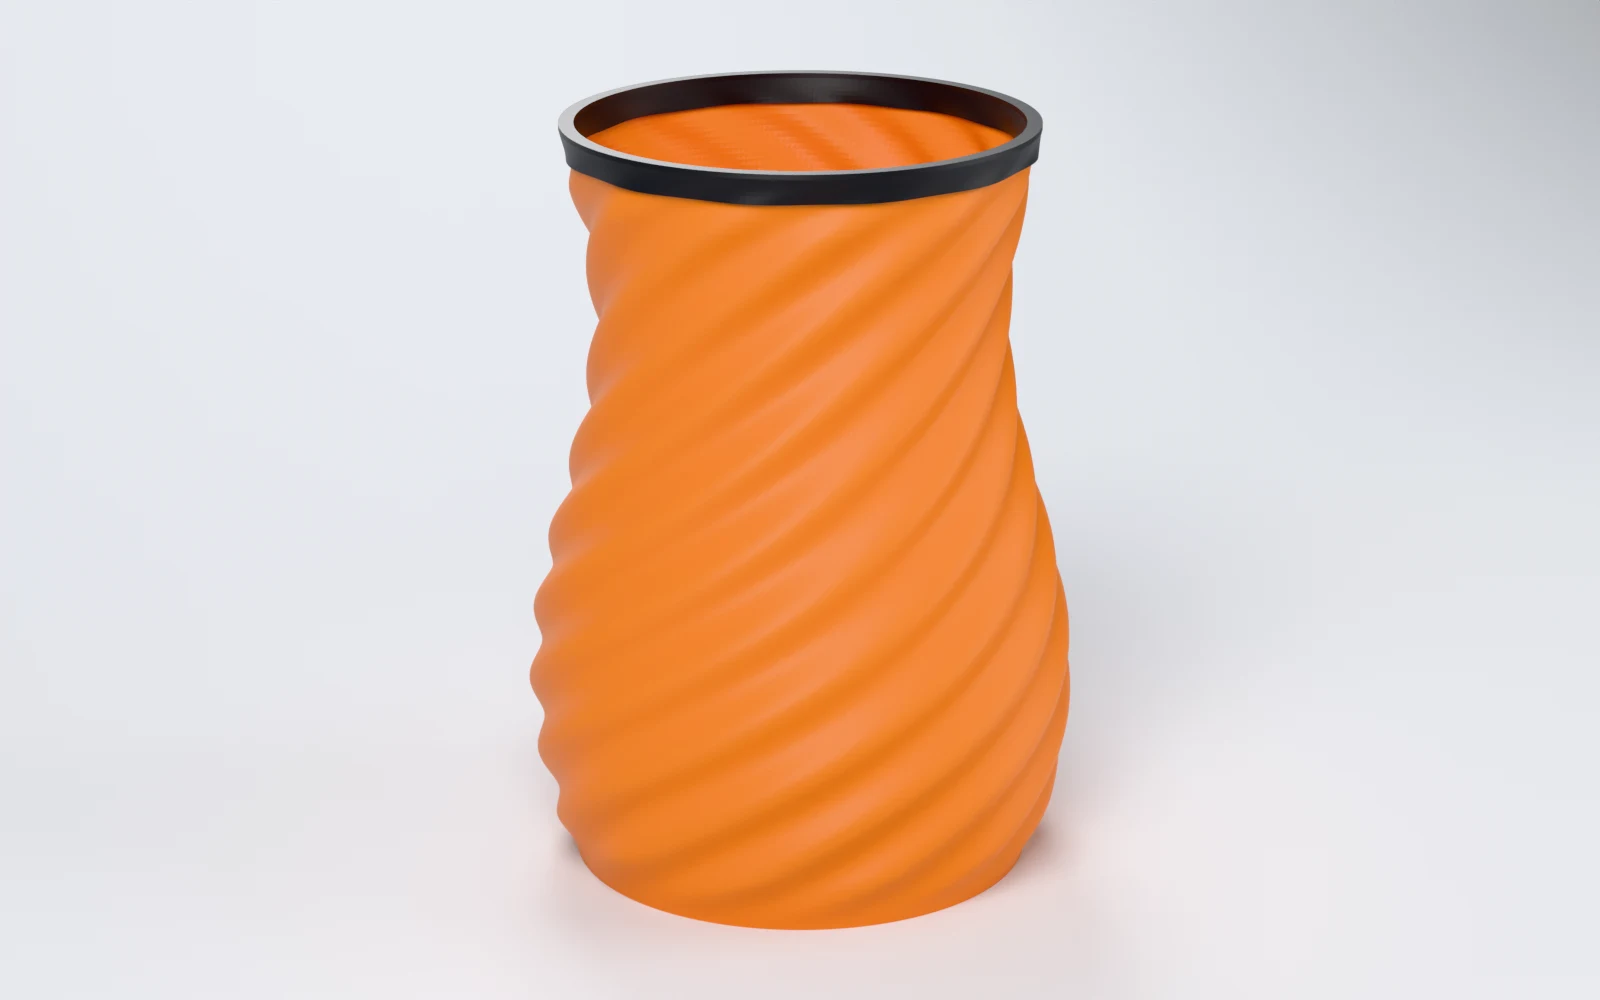
What can you make with Lamp Studio?
Shades from 60–320 mm tall and 20–150 mm in radius, for an E27 (41 mm) or E14 (28 mm) lamp holder. Makers print:
- A pendant or table lamp shade for an E27 or E14 holder.
- Ribbed, woven, twisted or organic shades that would take hours in CAD.
- A set of shades in one shape and several colours.
- A small Mini shade to try the vase-mode settings before the big print.
How do you design a lampshade, step by step?
Lamp Studio walks you through three steps: Shape, Style and Review. Continue takes you to the next one, and the shade beside the steps glows and follows every change.
1. Shape the shade
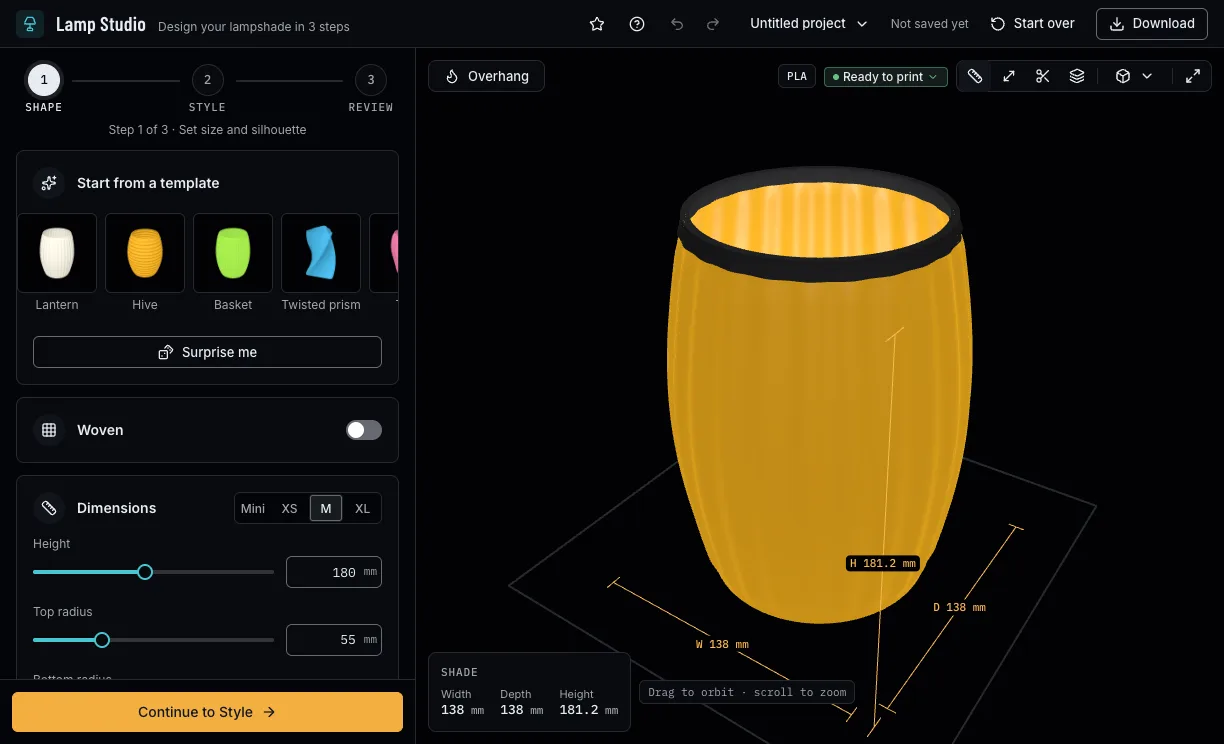
Start from a template or Surprise me, or set it yourself: a size (Mini, XS, M, XL), the height and the two radii, a silhouette, a form from triangle to round and a twist. Under Base plate & fitting, pick E27 (41 mm) or E14 (28 mm) for the hole and keep the stabiliser ring that holds the thin wall round.
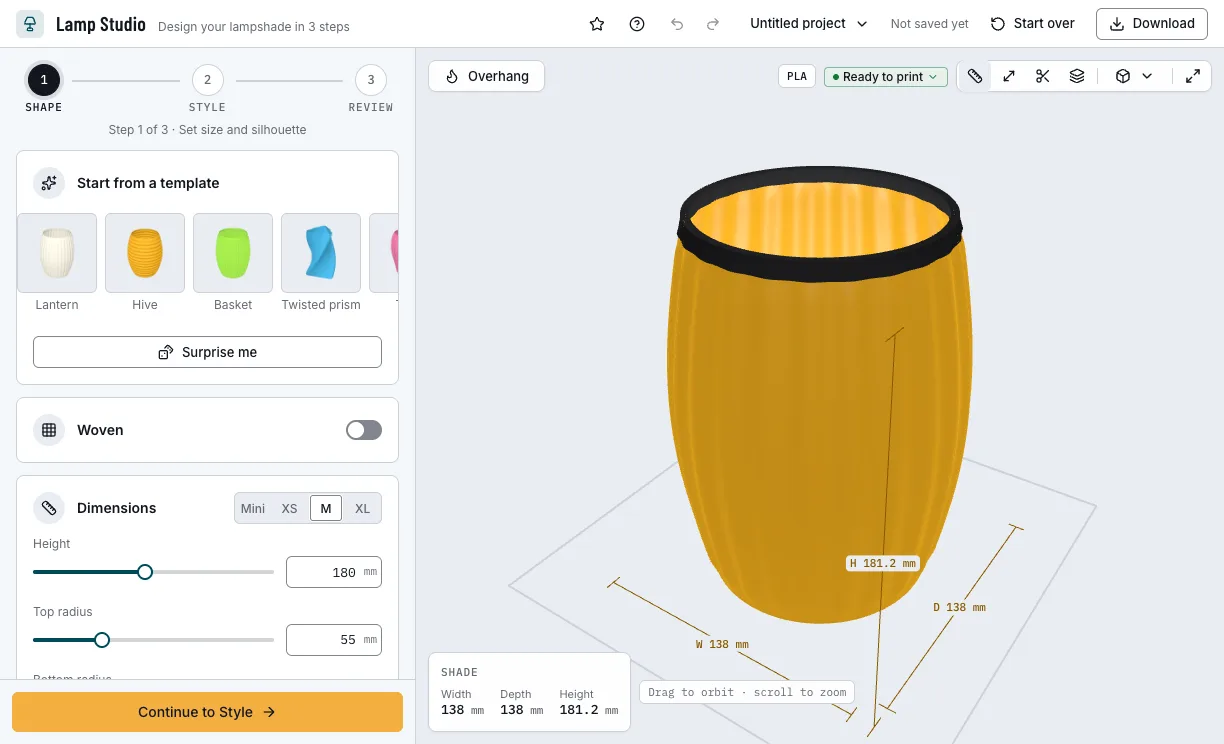
Step 1: the shape, the size and the fitting. 2. Style its surface
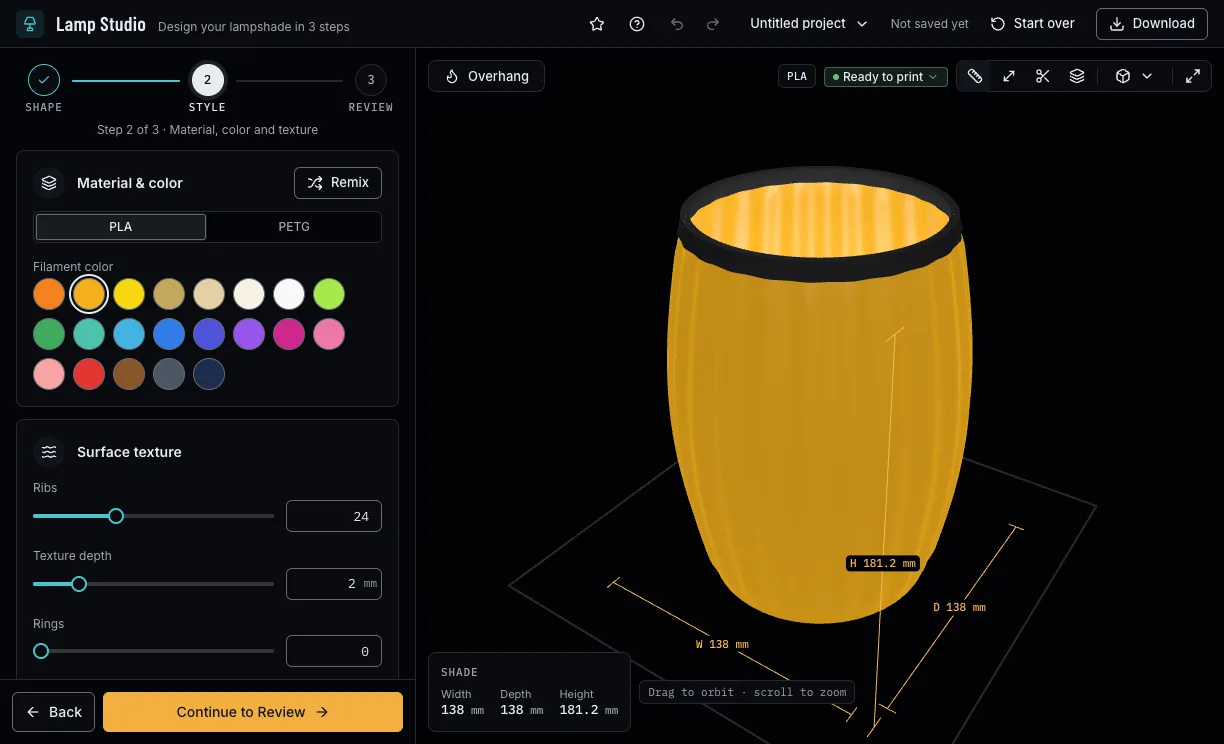
Choose PLA or PETG and a filament colour, then the surface: ribs and their depth, rings, organic deformation with a new pattern each time, and a fade that keeps the texture off the base and the rim. Remix tries another look in the same shape.
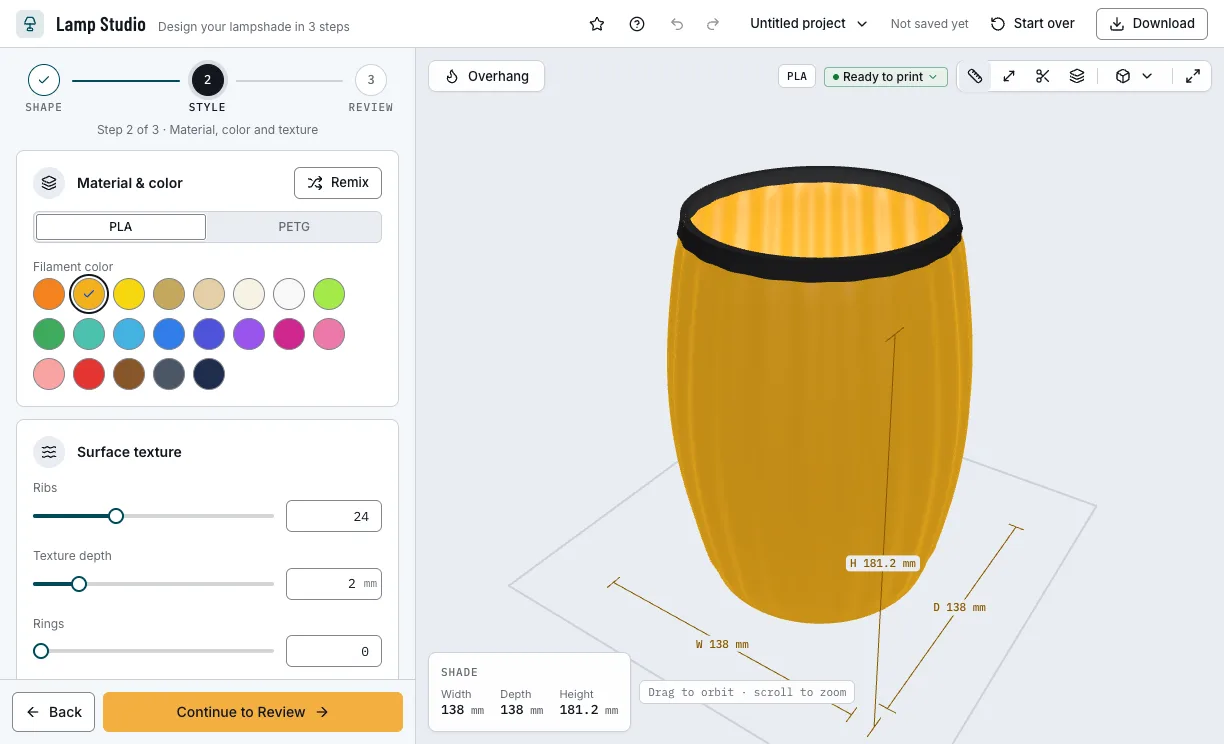
Step 2: the material, the colour and the texture. 3. Review the overhangs
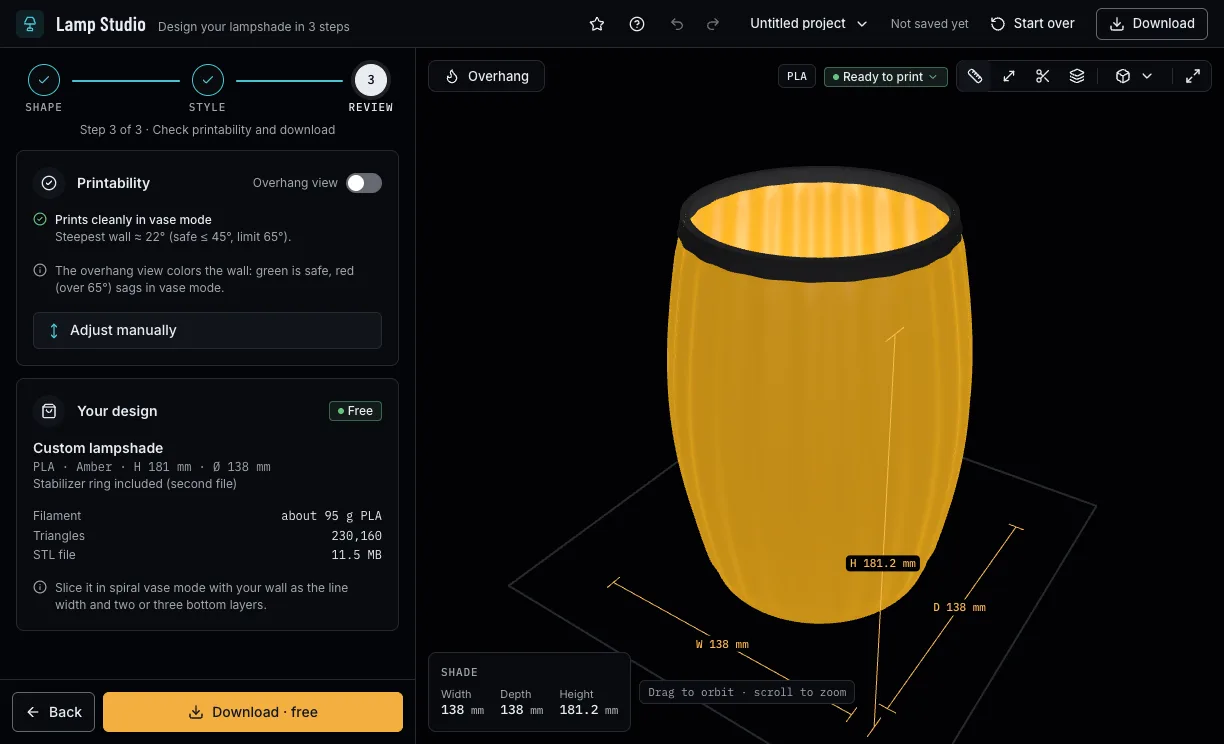
Review says whether the shade prints: walls up to 45° from upright print cleanly, steeper ones up to 65° need slow, well-cooled printing, and steeper still sag. The Overhang view colours them on the shade, and Adjust manually changes the silhouette and the radii right there.
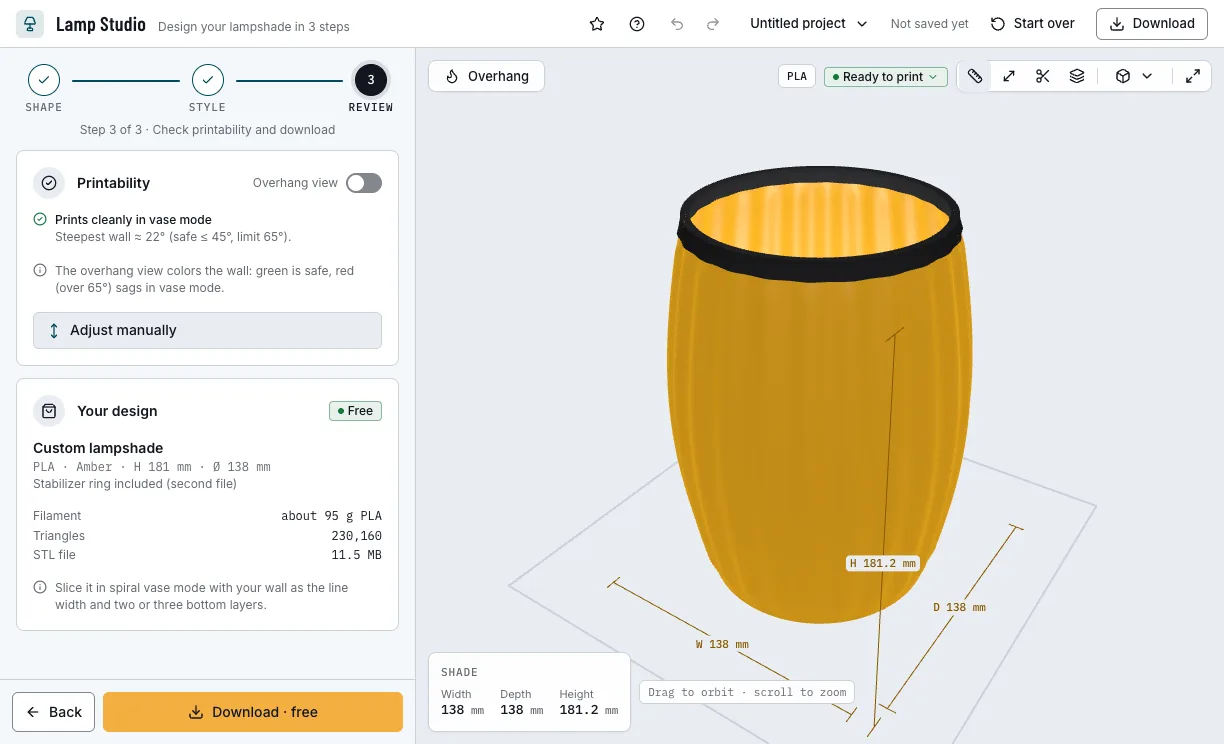
Step 3: the checks and the overhangs. 4. Download and slice in vase mode
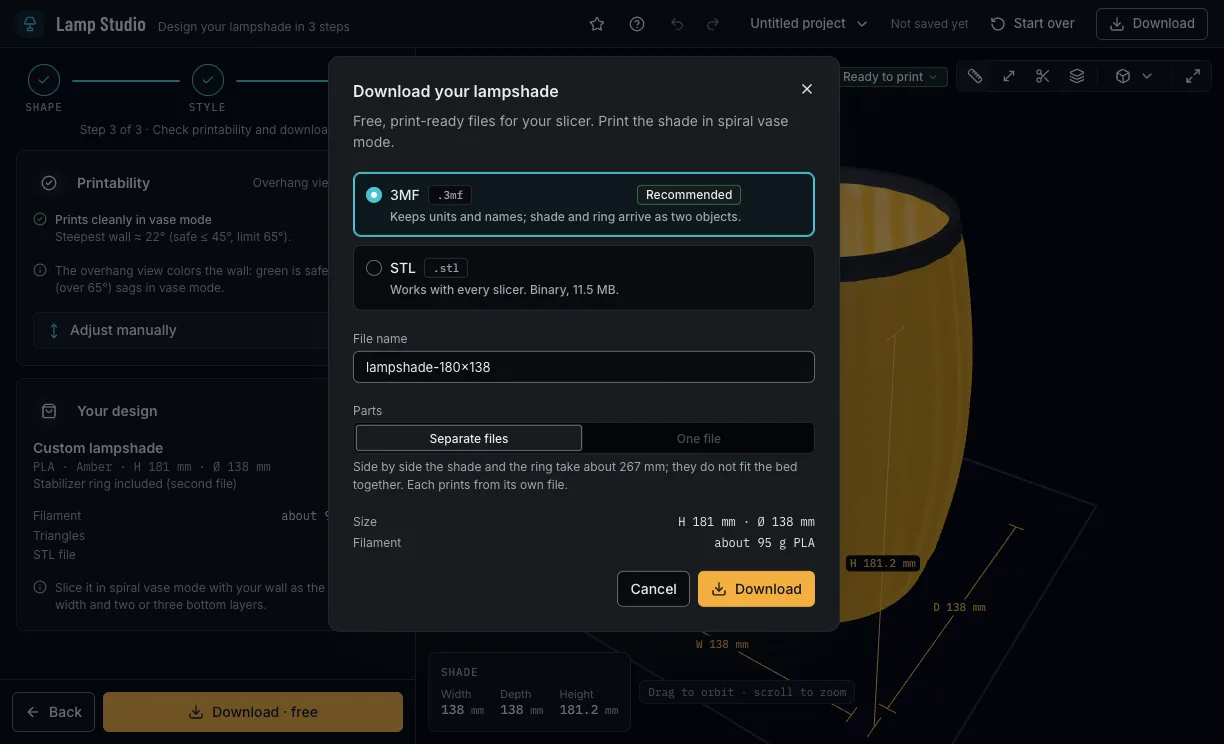
Download 3MF or STL with a free NabiMakes account: the shade and the ring as separate files, or one file when both fit the bed. Slice the shade in spiral vase mode with your wall as the line width and two or three bottom layers.
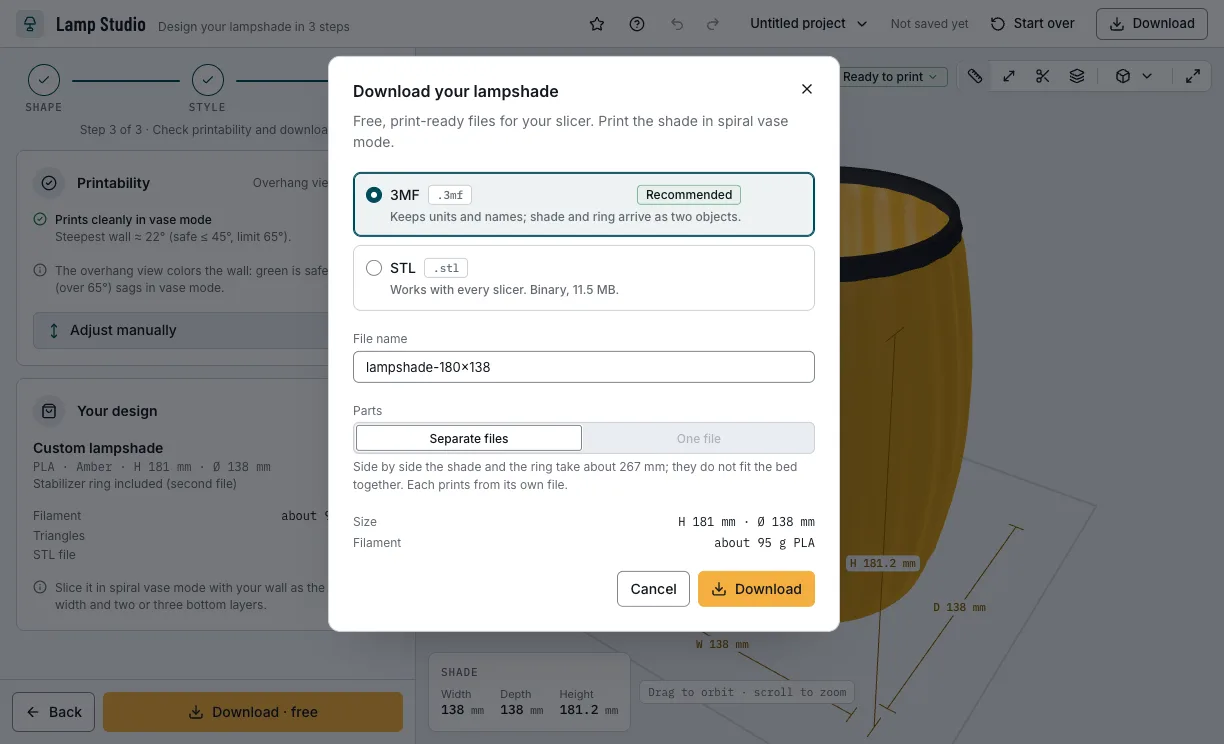
The download: 3MF or STL, ready for vase mode.
Which shades can you start from?
Each example opens in Lamp Studio as a new design, beside your own.
Lantern
A gentle curve with 32 fine ribs, in ivory for a warm, even glow.
- 180 mm tall
- 32 ribs
- E27
- Free
Pebble
No ribs, a soft organic deformation that makes every shade a little different.
- 180 mm tall
- Organic
- E27
- Free
Spiral for an E14 holder
An S-curve with twisted ribs, with the smaller hole for an E14 lamp holder.
- Three-quarter twist
- 12 ribs
- E14
- Free
Which print settings work best for a lampshade?
Print the shade in spiral vase mode: one wall from the base plate up, with the wall as the line width and two or three bottom layers. It needs no supports. The ring prints on its own, upside down on its cap. The layer height is a starting point for your slicer.
| Filament | Layer height to start | Thinnest wall | Supports | Notes |
|---|---|---|---|---|
| PLA | 0.2 mm | 0.8 mm | None | The easiest in vase mode; light colours glow best. |
| PETG | 0.2 mm | 0.8 mm | None | Glossier and tougher; print a little slower on steep walls. |
Tips for a shade that glows evenly
- Print the Mini size first: it tries your vase-mode settings in minutes.
- Set the slicer's line width to the shade's wall, so the one line lays down as designed.
- Light filaments glow; black is left out because it hides the light.
- Use an LED bulb: it stays cool, and a hot bulb can soften a printed shade.
- Clip the stabiliser ring over the rim: it keeps the thin wall round.
- Before you print, check it on the view's bar: Dimensions shows its size, Measure the distance between two points, Section cuts it open and Layers steps through it as your printer will.
What if the wall sags or the weave closes up?
- The steep part of the wall sags
- Soften the silhouette or the radii with Adjust manually in Review until no wall leans past 65°, and print that part slower with good cooling.
- Review says the weave is too deep
- Lower the texture depth or use fewer ribs: the strands may lean at most 45°.
- The weave strands bridge or close up
- Print a little cooler and slower; a weave that closes needs a texture deeper than half the wall.
- The wall is thinner or wider than the nozzle prints
- Set the wall to at least the nozzle and match the slicer's line width; more than 2.5 times the nozzle does not lay down well as one line.
- The ring and the shade do not fit the bed together
- Download them as separate files, or lower the radii.
Is Lamp Studio free?
Yes. Every shape, texture and download is free; downloading needs a free NabiMakes account, which also keeps your projects.
Free
Free- Every template, size, silhouette and form
- Ribs, rings, weave, twist and organic texture
- The stabiliser ring and both fittings
- 3MF and STL
Every setting, with its range and default
Lengths are in millimetres. Lamp Studio refuses values outside these ranges.
| Setting | Range | Default | What it does |
|---|---|---|---|
| 1 · Shape | |||
| Woven | On, off | Off | Weaves the ribs over and under like a basket. |
| Strand height | 1–6 mm | 2 mm | Woven only: the height of one strand. |
| Height | 60–320 mm | 180 mm | The shade from base to rim. |
| Top radius | 20–150 mm | 55 mm | The rim's radius. |
| Bottom radius | 20–150 mm | 55 mm | The base's radius. |
| Silhouette | Straight, curve, hourglass, S-curve, dome | Curve | The outline from base to rim. |
| Bulge, waist, sway or shoulder | 0–60 mm | 12 mm | How far the silhouette bends; named for the silhouette, none for straight. |
| Form | Triangle, square, pentagon, round | Round | The shape seen from above. |
| Corner rounding | 0–100 % | 35 % | Not for round: from sharp corners to a circle. |
| Twist | −2–2 turns | 0 turns | Turns the form and the ribs from base to rim. |
| Hole diameter | 10–80 mm | 41 mm | The lamp holder's hole; E27 (41 mm) or E14 (28 mm) set it. |
| Bulb clearance | 0–200 mm | 64 mm | The diameter kept free round the bulb; 0 turns it off. |
| Plate | 0.6–5 mm | 1.6 mm | The base plate's thickness. |
| Wall | 0.4–2.4 mm | 0.8 mm | Your slicer's line width in vase mode. |
| Stabilizer ring | On, off | On | A ring that clips over the rim and keeps the wall round. |
| Ring height | 2–20 mm | 6 mm | How far the ring reaches down the rim. |
| Outer lip | 0.8–5 mm | 1.2 mm | The ring's wall outside the shade. |
| Inner lip | 0.8–5 mm | 1.2 mm | The ring's wall inside the shade. |
| Fit tolerance | 0–1 mm | 0.2 mm | The play between the ring and the wall. |
| 2 · Style | |||
| Material | PLA, PETG | PLA | Changes the filament estimate. |
| Filament color | 21 colours | Amber | The shade's colour; black is left out, it hides the light. |
| Ribs | 0–72 | 24 | How many ribs run up the wall. |
| Texture depth | 0–12 mm | 2 mm | How deep the ribs are; the weave's depth while woven, which has a limit. |
| Rings | 0–24 | 0 | Rings round the shade, from base to rim. |
| Ring depth | 0–12 mm | 2 mm | How deep the rings are. |
| Deformation amount | 0–12 mm | 0 mm | Organic bumps in the wall; off while woven. |
| Around | 1–12 × | 4 × | How many bumps go round the shade. |
| Up | 0.5–12 × | 2 × | How many bumps go up the shade. |
| New pattern | A button | The first pattern | Draws the bumps again in a new arrangement. |
| Bottom fade | 0–150 mm | 15 mm | Keeps the texture off the base over this height. |
| Top fade | 0–150 mm | 15 mm | Keeps the texture off the rim over this height. |
| Download | |||
| Format | 3MF, STL | 3MF | 3MF keeps the units and names; STL works with every slicer. |
| Parts | Separate files, one file | Separate files | With the ring: one file only when both fit the bed. |