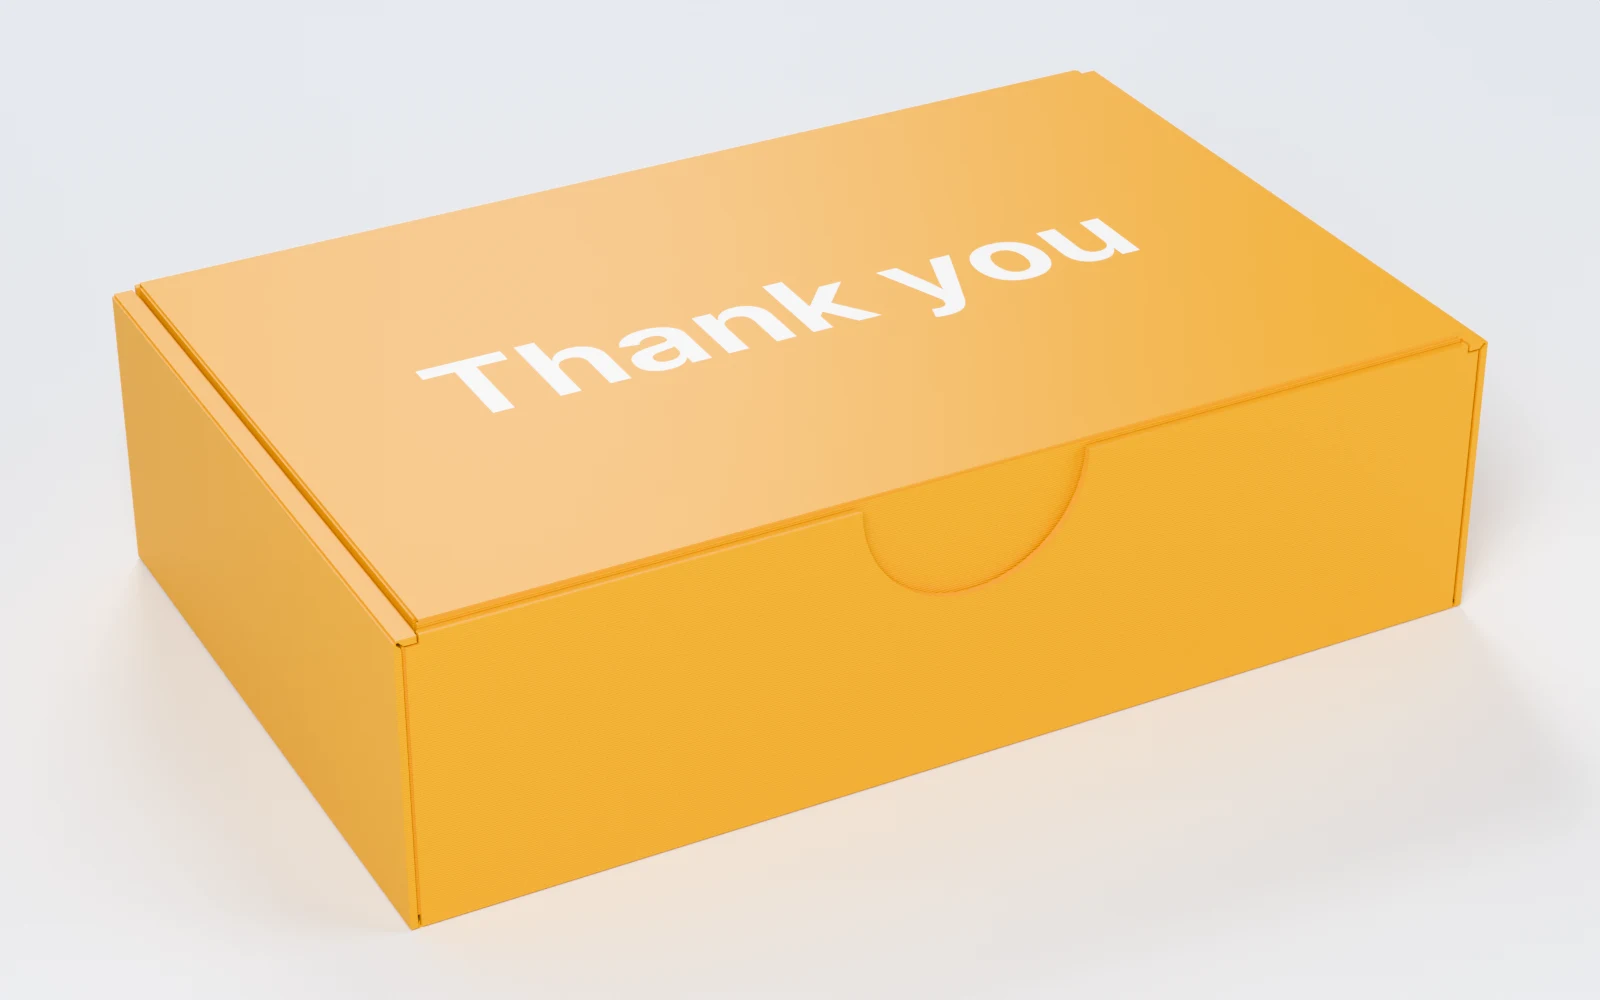
What can you make with Foldable Box Studio?
Boxes from 20–300 mm wide and deep inside, and up to 250 mm tall. Makers print:
- Gift and shipping boxes with a shop's logo on the lid.
- A business-card box that folds closed with a tuck flap.
- A magnetic tray with a lid for jewellery or small parts.
- Product cartons with tuck lids and seams that lock without glue.
- A cigar or pen box with a front scoop to lift the lid.
How do you design a box, step by step?
Foldable Box Studio walks you through six steps. Continue takes you to the next one, and you can click any step to go back. Fold it beside the steps folds the box closed the way you will.
1. Pick the kind of box
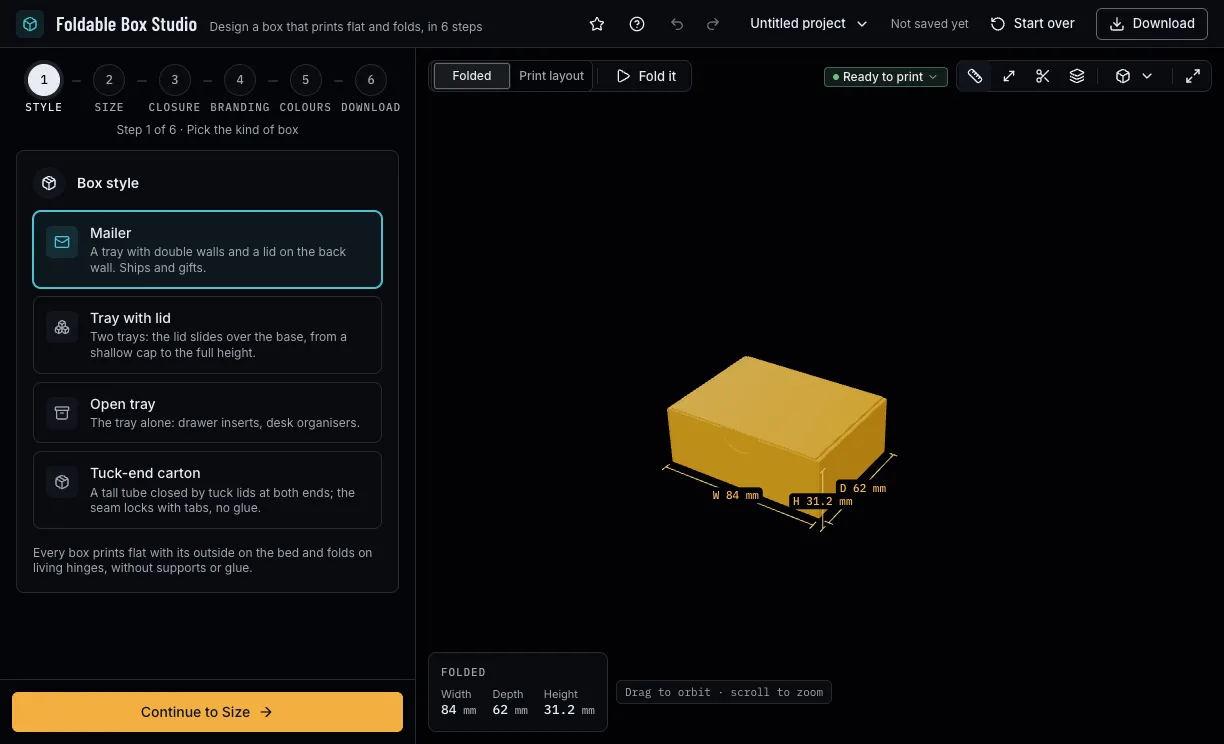
Choose a Mailer, tray with lid, open tray, tuck-end carton. Each prints flat with its outside on the bed and folds on living hinges.
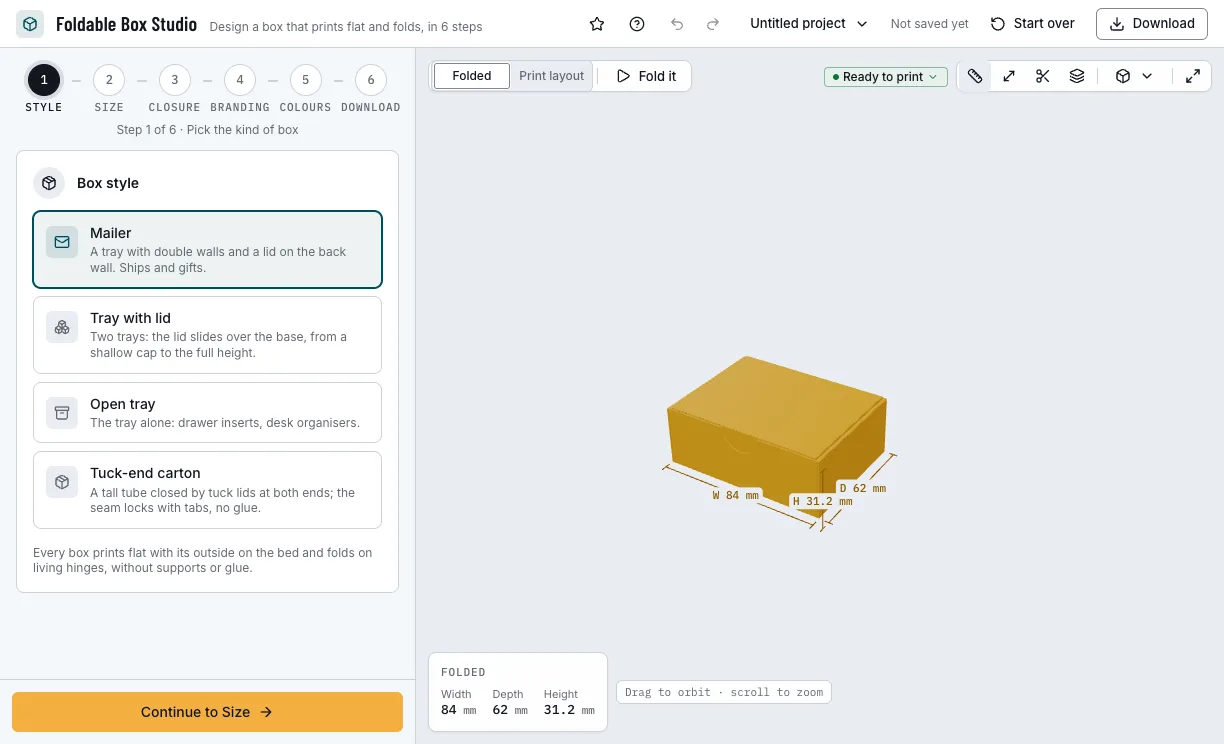
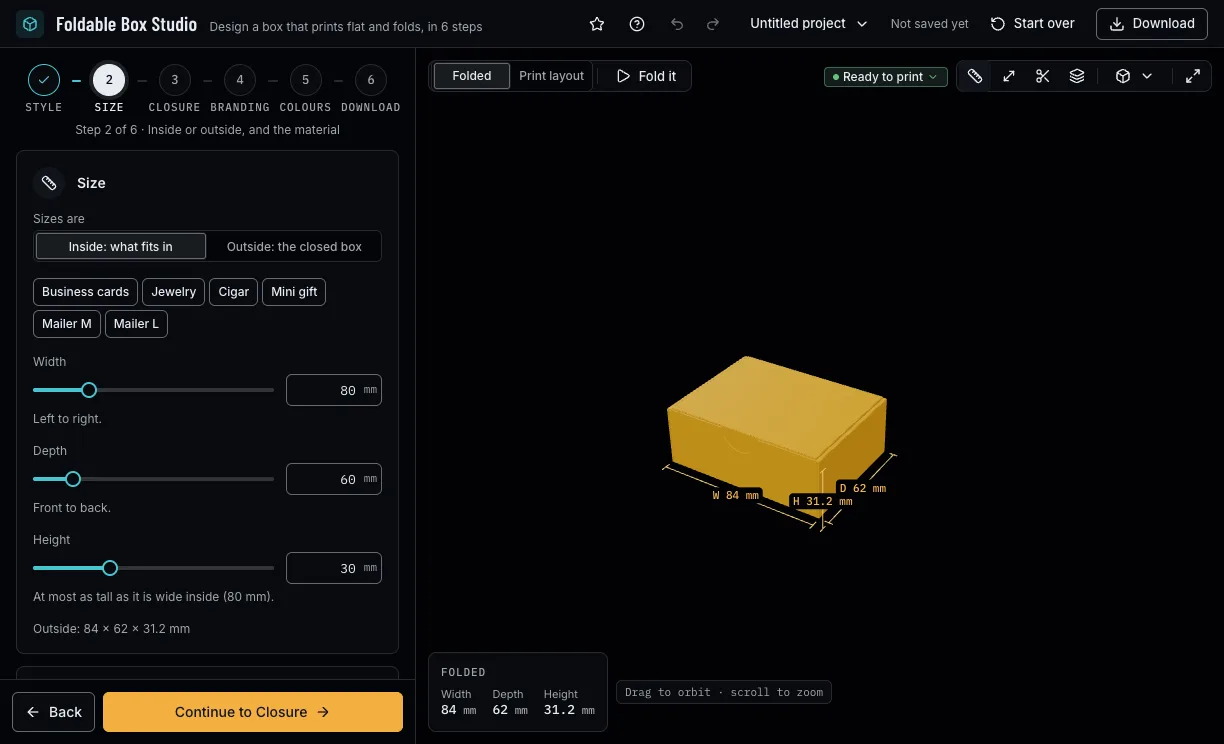
Step 1: the kind of box. 2. Size it and set the material
Give the size inside (what fits in) or outside (the closed box), or start from a preset such as Business cards. Then the layer height, the panel and hinge thickness (0.6 mm and 0.2 mm to start) and the fit clearance.
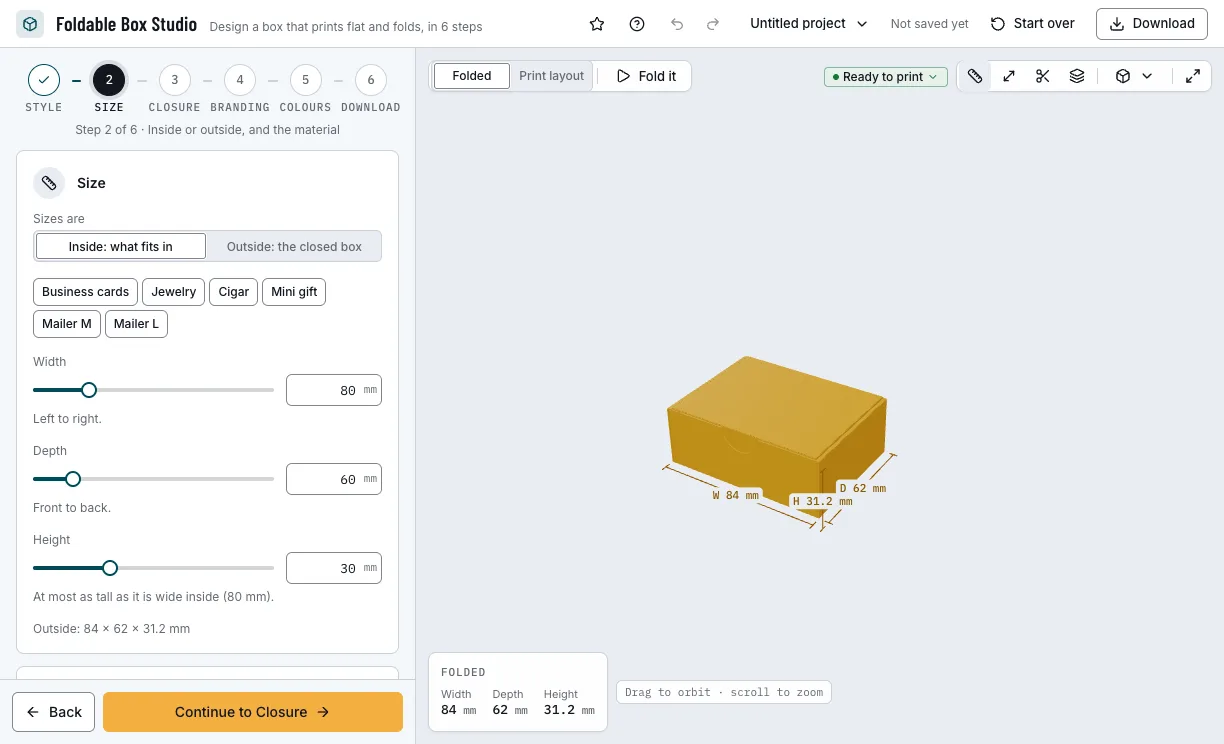
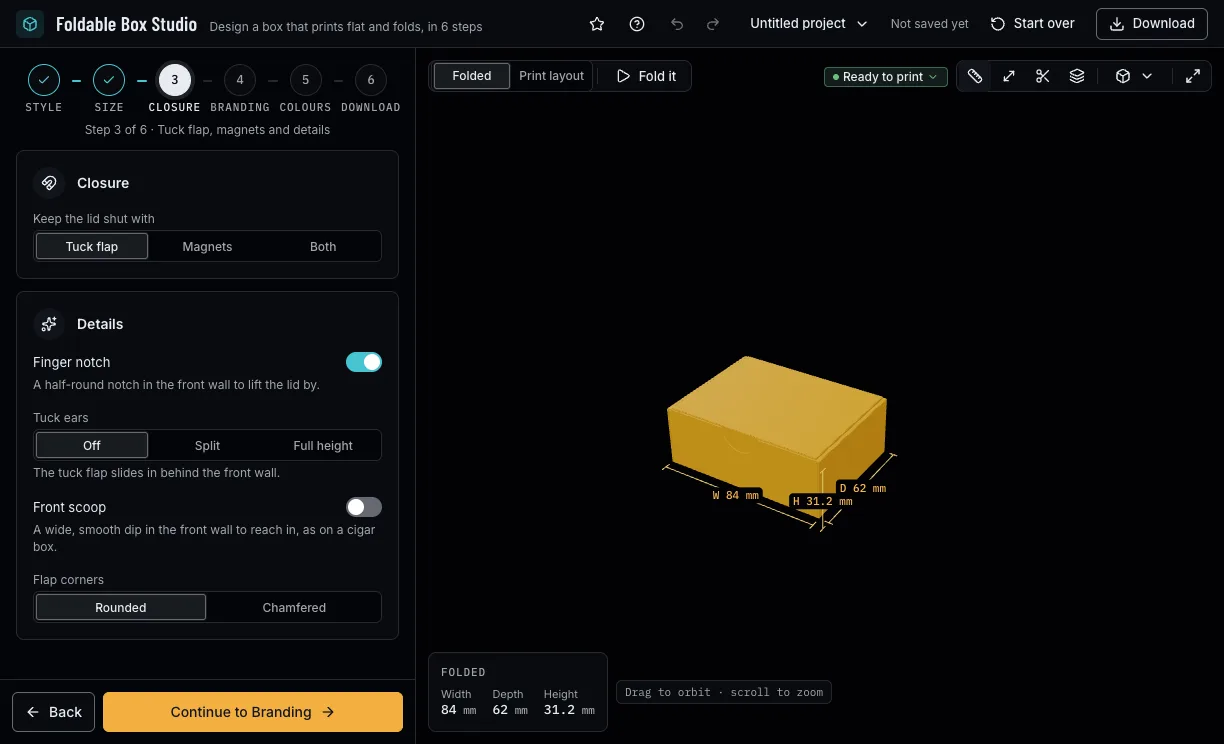
Step 2: the size and the material. 3. Choose the closure
Keep the lid shut with a tuck flap, magnets (6 × 2, 8 × 2, 10 × 3 mm or your own) or both, and add details: a finger notch, a front scoop, tuck ears, the flap corners and, on a tray with a lid, how deep the lid covers.
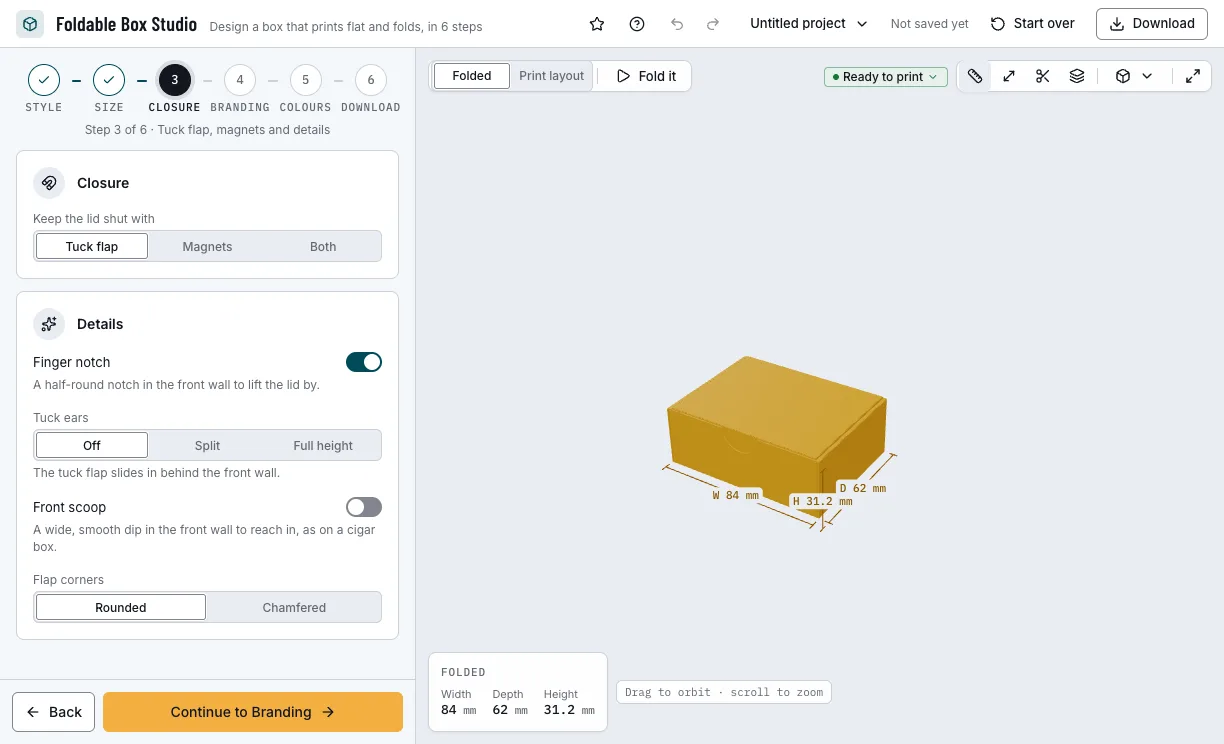
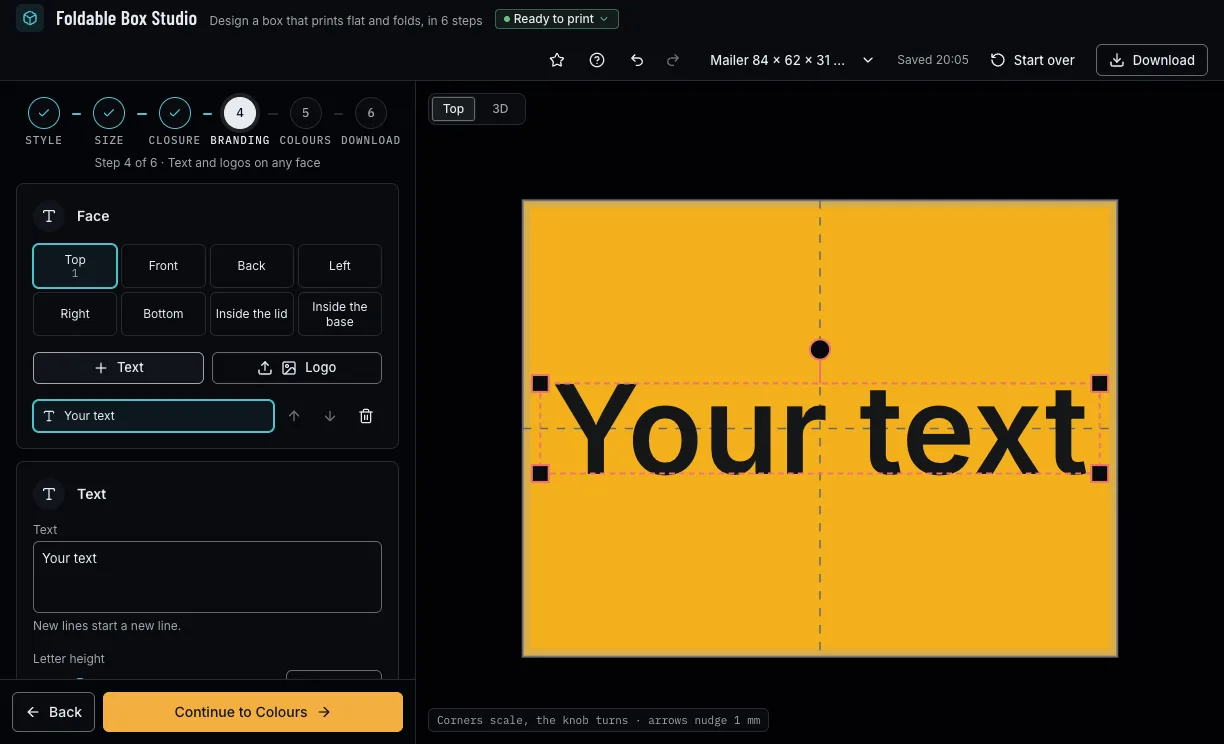
Step 3: the closure and the details. 4. Add your branding
Pick a face and add text or a logo (SVG, PNG or JPEG), up to 20 on each face. Drag, scale and turn them on the face, or type the size and the position.
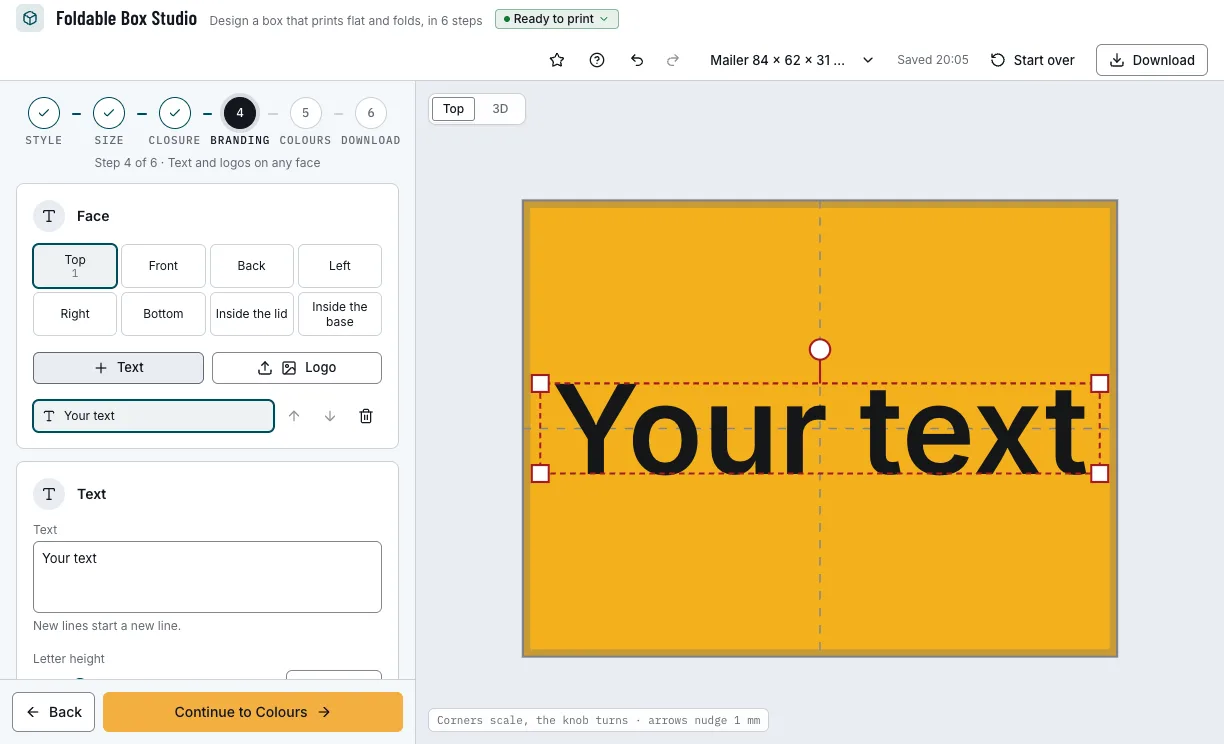
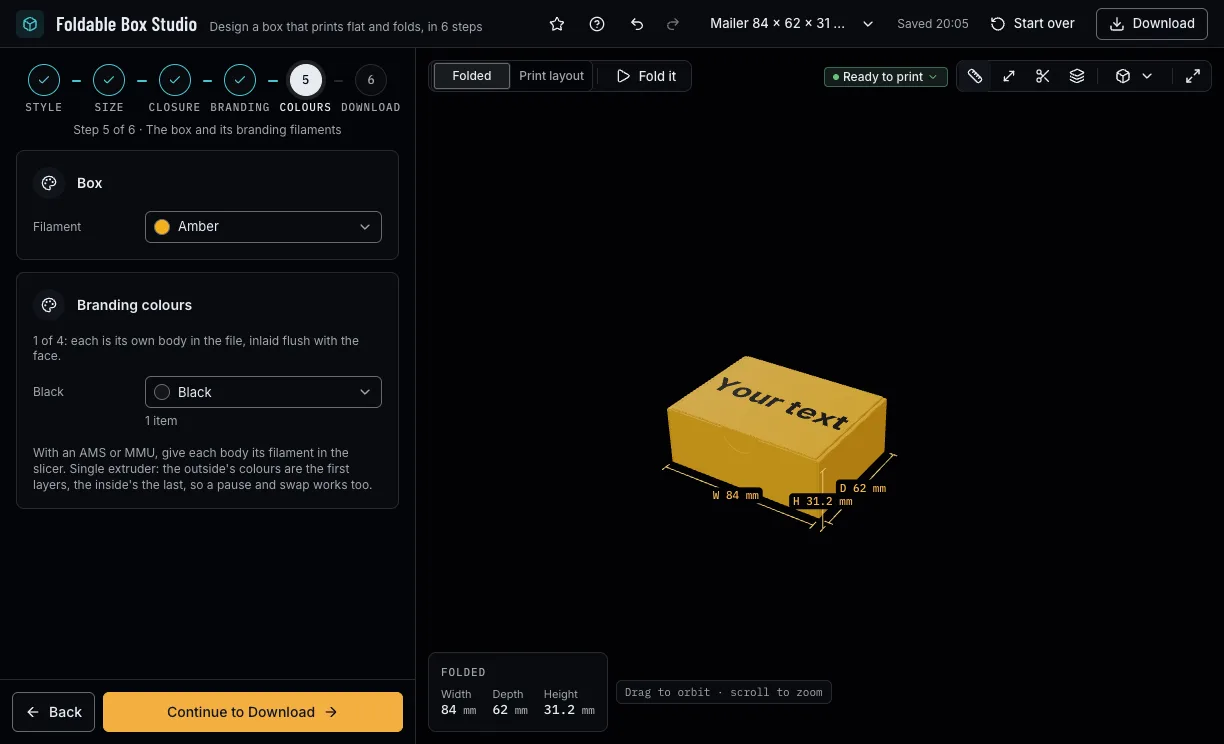
Step 4: text and logos on any face. 5. Choose the colours
The box's filament, and up to 4 more for the branding, printed as inlays for a multi-material printer or by a filament change on one nozzle.
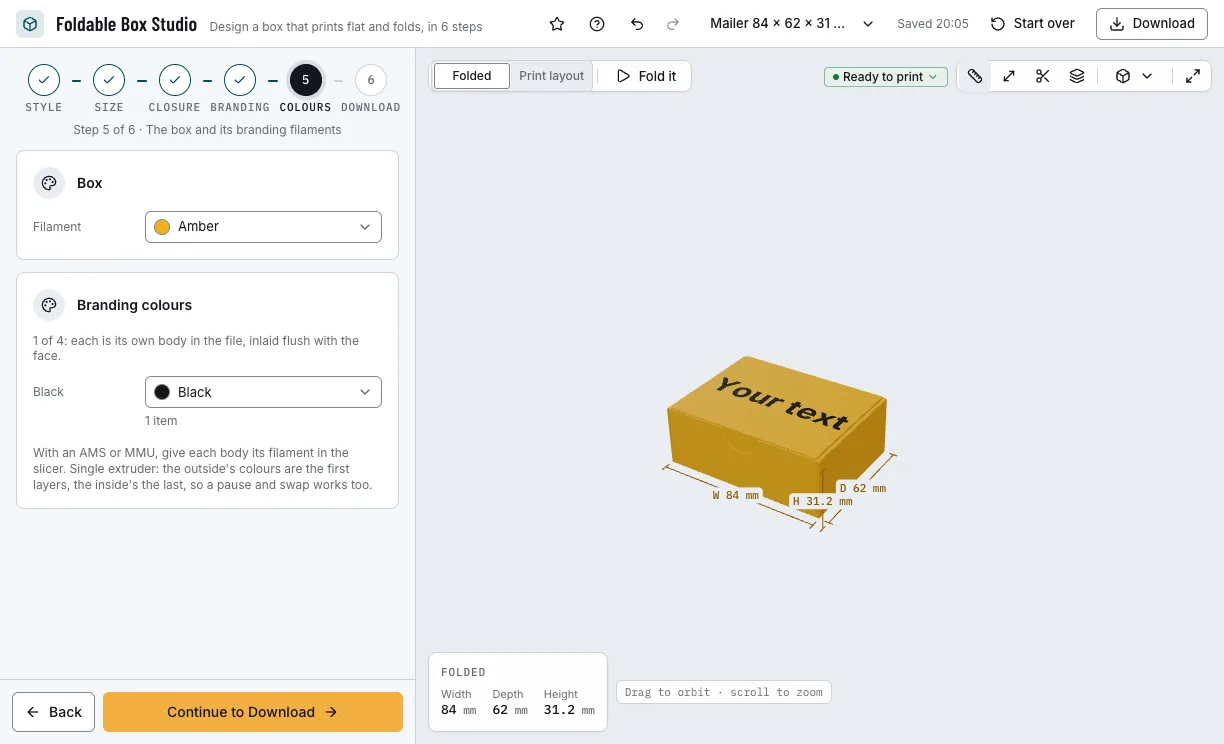
Step 5: the box and its branding filaments. 6. Check it and download
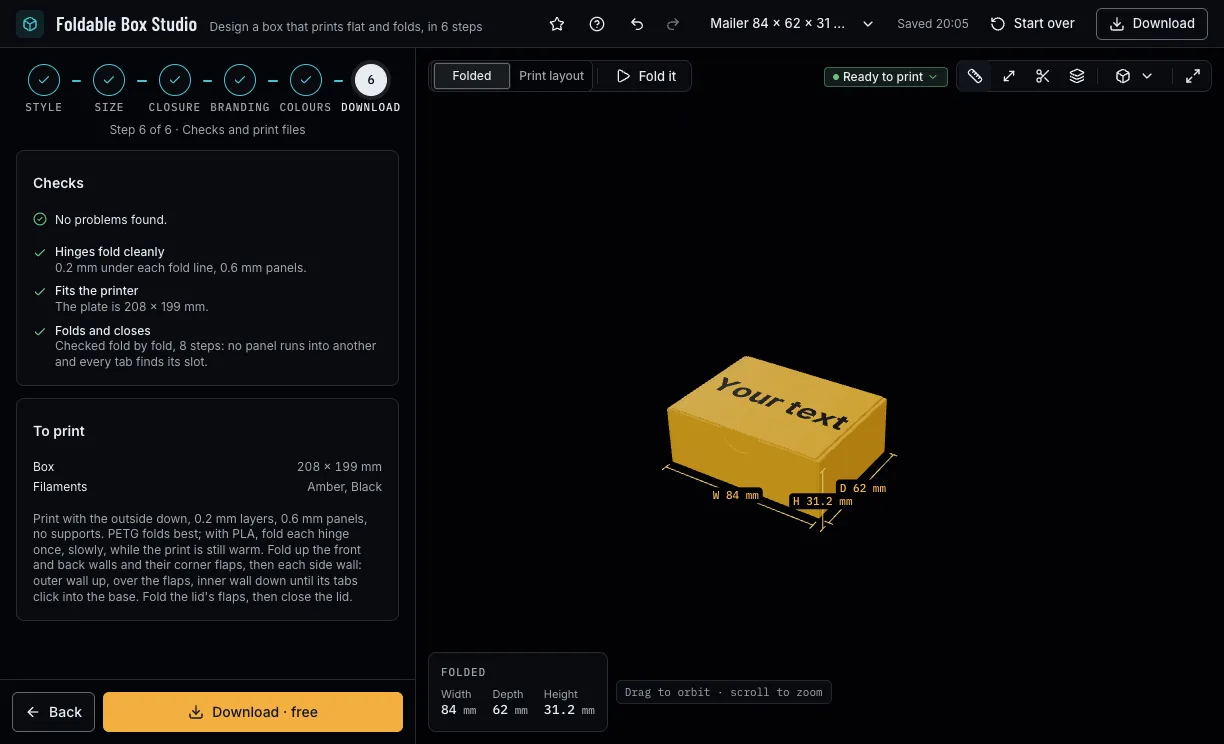
The checks fold the box hinge by hinge and say whether it closes and fits your bed. Download 3MF or STL with a free NabiMakes account, one file per plate, and print with the outside down.
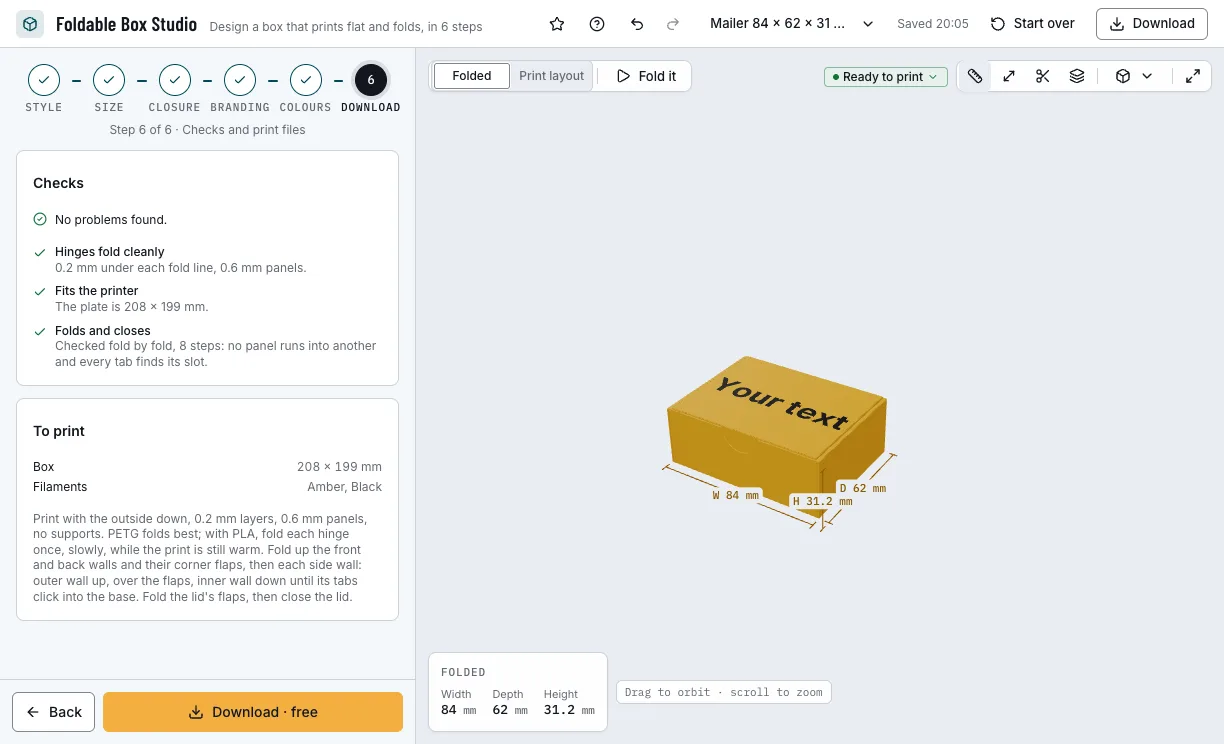
Step 6: the checks and the print files.
Which boxes can you start from?
Each example opens in Foldable Box Studio as a new design, beside your own.
Business card mailer
A mailer for a stack of cards, closed by its tuck flap, with a thank-you on the lid.
- 92 × 58 × 25 mm inside
- Tuck flap
- Free
Magnetic tray with lid
A base and a lid that covers it whole, held shut by two pairs of 6 × 2 mm magnets.
- 80 × 60 × 30 mm inside
- Magnets
- Two plates
- Free
Tuck-end carton
A tall carton closed by tuck lids at both ends, its seam locked by tabs.
- 50 × 30 × 90 mm inside
- Tuck ends
- Free
Which print settings work best for a folding box?
Print it as it downloads: flat, with the outside on the bed and no supports. The layer height is the one you set in the Size step, since the hinges are a number of layers thick.
| Filament | Layer height to start | Thinnest wall | Supports | Notes |
|---|---|---|---|---|
| PETG | 0.2 mm | 0.8 mm | None | Folds best and its hinges last longest. |
| PLA | 0.2 mm | 0.8 mm | None | Works too: fold each hinge once, slowly, while the print is still warm. |
Tips for a box that folds and closes
- Fold each hinge once, slowly, the first time: it then folds the same way every time.
- Keep the hinges 0.2 to 0.4 mm thick: thinner ones tear, stiffer ones crack.
- Make panels 0.8 to 1.2 mm thick on a box over 150 mm, or it bends.
- Outside colours print in the first layers and inside colours in the last, so one nozzle can swap filament at a pause.
- Before you print, check it on the view's bar: Dimensions shows its size, Measure the distance between two points, Section cuts it open and Layers steps through it as your printer will.
What if the box does not fold closed or the hinges crack?
- The checks say the box does not fold closed
- Change the size, the thickness or the closure: the fold simulation must pass before it downloads.
- The hinges crack
- Make the hinges thinner, 0.2 to 0.4 mm, print in PETG, or fold PLA while it is still warm.
- The lid rattles or the tabs slip
- Lower the fit clearance: above 0.45 mm the parts are loose.
- The magnets have no room
- Use fewer pairs, smaller or thinner magnets, or a wider or taller box.
- The plate fits the bed only turned
- Turn it 90° in your slicer, or pick a smaller size.
Is Foldable Box Studio free?
Yes. Every box, closure and download is free; downloading needs a free NabiMakes account, which also keeps your projects.
Free
Free- Mailers, trays with lids, open trays and cartons
- Tuck flaps, magnets and every detail
- Text and logos in up to 4 colours
- 3MF and STL
Every setting, with its range and default
Lengths are in millimetres, inside the box unless you choose outside.
| Setting | Range | Default | What it does |
|---|---|---|---|
| 1 · Style | |||
| Box style | Mailer, tray with lid, open tray, tuck-end carton | Mailer | The kind of box. |
| 2 · Size | |||
| Sizes are | Inside, outside | Inside | Inside: what fits in; outside: the closed box. |
| Width | 20–300 mm | 80 mm | Left to right. |
| Depth | 20–300 mm | 60 mm | Front to back. |
| Height | 8–250 mm | 30 mm | At most as tall as it is wide inside; the carton stands up, its tube's length. |
| Layer height | 0.1 mm, 0.2 mm | 0.2 mm | Print with this layer height: panels and hinges are whole layers. |
| Panel thickness | Two layers to 3 mm | 0.6 mm | 0.6 mm folds like card; thicker for large boxes. |
| Hinge thickness | One layer to 1 mm, at most half the panel | 0.2 mm | The strip each fold bends on. |
| Fit clearance | 0–0.6 mm | 0.2 mm | 0.2 mm suits most printers. |
| 3 · Closure | |||
| Keep the lid shut with | Tuck flap, magnets, both, its fit, by style | Tuck flap | What the style offers: a mailer all three, a tray with lid its fit or magnets. |
| Magnets | 6 × 2, 8 × 2, 10 × 3 mm, custom | 6 × 2 mm | With magnets: the size of the round magnets. |
| Magnet diameter | 3–20 mm | 6 mm | Custom magnets. |
| Magnet thickness | 1–6 mm | 2 mm | Custom magnets. |
| Pairs | 2, 3, 4 | 2 | How many pairs; two with a tuck flap as well. |
| Pocket play | 0–0.4 mm | 0.1 mm | 0.1 mm presses in; glue holds them either way. |
| Finger notch | On, off | On | Mailer: a notch to lift the lid. |
| Tuck ears | Off, split, full height | Off | Mailer with the tuck alone: ears that hold the flap in the side walls. |
| Front scoop | On, off | Off | Not on the carton: a scoop in the front wall. |
| Lid depth | The whole box, or from 5 mm | The whole box | Tray with lid: how far down the lid covers. |
| Lid finger scoops | On, off | On | Tray with lid: scoops to lift the lid off. |
| Flap corners | Rounded, chamfered | Rounded | The shape of the flaps' corners. |
| 4 · Branding | |||
| Face | 8 faces, by style | Top | Where the text or logo goes, inside the lid and the base too. |
| Text | Up to 120 characters | Your text | Letters, digits and Latin accents. |
| Letter height | 2–60 mm | Fitted to the face | The height of the capitals. |
| Align lines | Left, centre, right | Centre | For text over several lines. |
| Logo width | 2–300 mm | Fitted to the face | An SVG, PNG or JPEG logo's width on the face. |
| Across and up | Within the face | 0 mm | The position from the face's centre. |
| Turn | −180–180° | 0° | Turns the text or logo on the face. |
| 5 · Colours | |||
| Box | Every filament colour | Amber | The box's filament. |
| Branding colours | Up to 4 more | Black, or white on a black box | Each text's or logo fill's filament; merge some into the box's colour. |
| 6 · Download | |||
| Format | 3MF, STL | 3MF | 3MF keeps each colour as its own object; STL merges them, one mesh per plate. |